Launch EC2 Instance with Pre-installed Jenkins and Docker Using User Data and Understanding IAM roles☁


Hello Learners,
Welcome to day 39 of the #90DaysOfDevOps challenge initiated by Shubham Londhe . In my previous blogs, I have learned about Identity And Access management (IAM). In this blog, I will focus on
Automating Instance Setup in Amazon EC2 with User Data
Launch the EC2 instance with already installed Jenkins and Docker on it.
Learn about IAM Roles and explain the IAM Users, Groups, and Roles.
Create the user roles to assign some tasks.
Need of AWS:
In today's digital landscape, where agility, scalability, and security are paramount, Amazon Web Services (AWS) has emerged as a foundational pillar of cloud computing. AWS, a subsidiary of Amazon, offers a comprehensive suite of cloud services that empower businesses and individuals to build, deploy, and manage applications and services with unparalleled flexibility and efficiency. From startups to enterprises, organizations around the world are leveraging AWS to innovate faster, reduce costs, and drive transformative change. As we delve into the world of AWS, it's crucial to grasp one of its fundamental aspects: Identity and Access Management (IAM). IAM serves as the bedrock for securing your AWS resources, ensuring that the right individuals or systems have the appropriate level of access.
In this blog, we will embark on a journey to unravel the basics of AWS and delve into the essential concepts of IAM. Whether you're a seasoned IT professional or just starting to explore the cloud, understanding AWS and IAM will set you on a path to harnessing the full potential of this dynamic cloud platform. So, let's begin our exploration of AWS and IAM, and equip ourselves with the knowledge to navigate the cloud landscape confidently.
Automating Instance Setup in Amazon EC2 with User Data:
When launching an instance in Amazon Elastic Compute Cloud (EC2), you're granted a powerful tool to streamline initial configurations and automate tasks through the use of user data. User data is information that can be passed to an instance during its launch, enabling you to perform a range of automated setup tasks or execute scripts immediately after the instance starts running.
Amazon EC2 offers two primary options for passing user data:
Shell Scripts: You can provide a shell script as user data. This script contains a series of commands that the instance will execute sequentially after launch. These commands could encompass tasks like software installation, configuration adjustments, and application setup. This method is particularly useful for quickly configuring instances based on your specific requirements.
Cloud-Init Directives: Cloud-init is a versatile system for initializing and configuring instances in a cloud environment. It supports a wide array of actions, including user and group creation, package installation, and network configuration. By utilizing cloud-init directives in your user data, you can ensure a more comprehensive and dynamic setup of your instance, tailored to your needs.
By leveraging user data, you can significantly reduce manual intervention and ensure consistent configurations across your instances. This functionality is especially beneficial when deploying multiple instances that need similar setup or when orchestrating complex environments that require specific software installations and custom configurations.
In summary, when launching an instance in Amazon EC2, the option to provide user data empowers you to automate configuration tasks and execute scripts seamlessly. Whether you choose shell scripts or cloud-init directives, this feature enhances your ability to efficiently set up instances to meet your unique requirements.
What is IAM:
AWS Identity and Access Management (IAM) is a crucial web service that empowers you to establish robust control over access to your AWS resources. With IAM, you can ensure the security and integrity of your cloud environment by efficiently managing permissions that dictate users' interactions with AWS resources.
IAM operates as a centralized authorization and authentication hub, offering the following capabilities:
Centralized Permission Management: IAM enables you to define and regulate permissions that determine which AWS resources users are allowed to access. This centralized approach ensures consistent and standardized access controls across your entire AWS infrastructure.
Authentication and Authorization: IAM plays a dual role by handling both authentication (verifying user identities) and authorization (assigning appropriate permissions). This ensures that only authenticated users with the necessary permissions can access resources, bolstering security.
User and Resource Management: IAM facilitates the creation and management of users, groups, and roles. You can define users' associations with groups and roles, streamlining access assignments and maintaining a clear user hierarchy.
Granular Permission Assignment: IAM enables you to grant precise permissions to individuals or groups based on their responsibilities. This fine-grained approach minimizes the risk of unauthorized access and data breaches.
Security Best Practices: By employing IAM, you can adhere to the principle of least privilege, ensuring that users only possess the minimal permissions required for their tasks. This practice enhances security by limiting potential damage caused by compromised credentials.
In essence, AWS IAM provides a robust framework for controlling access to your AWS resources. It serves as a vital tool for safeguarding your cloud infrastructure, allowing you to manage who can sign in to your resources and what actions they're authorized to perform.
✅Task1:
- Launch the EC2 instance with already installed Jenkins and Docker on it. Once the server shows up in the console, hit the IP address in the browser and your Jenkins page should be visible.
🚀Steps:
Open the AWS Management Console and go to the EC2 Dashboard and Click the "Launch Instance" button.
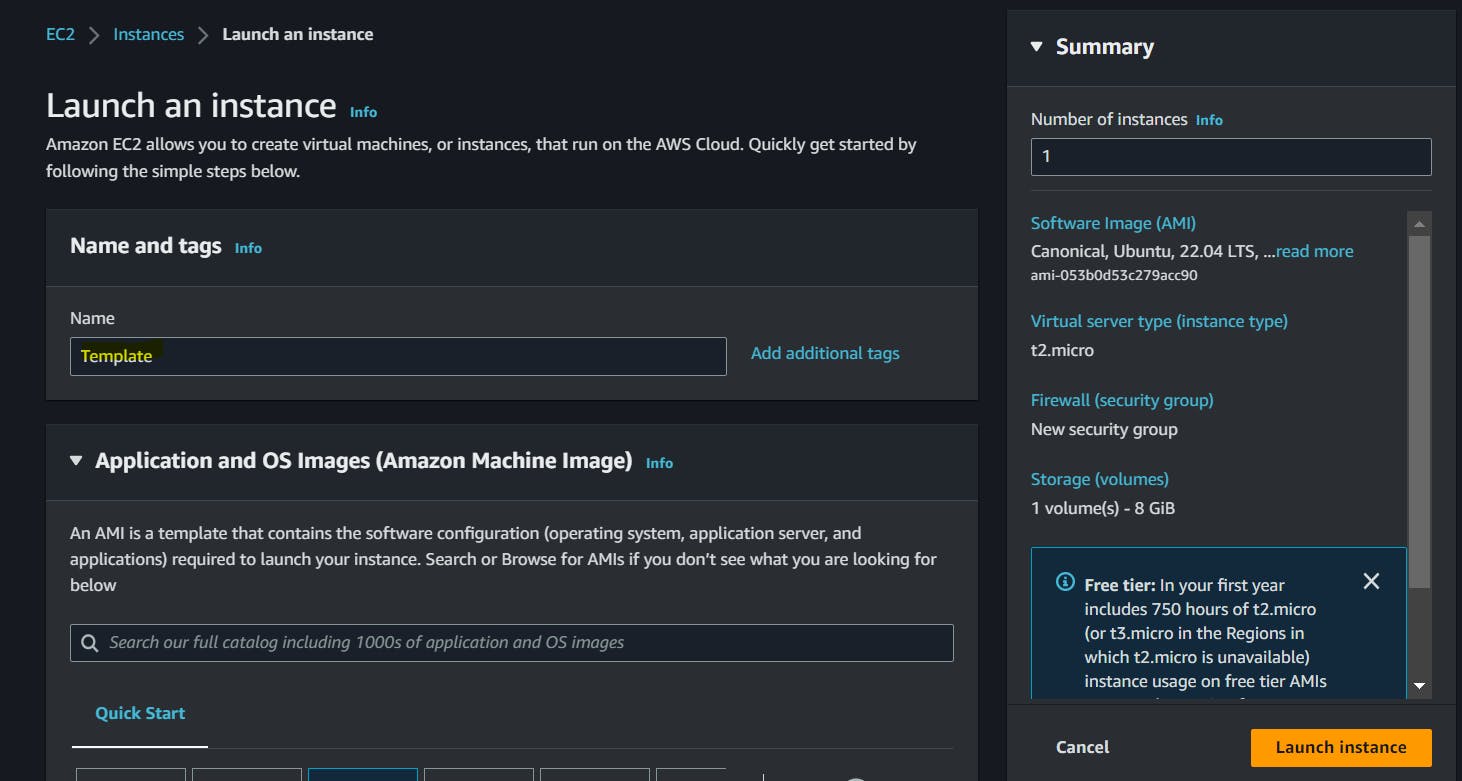
Choose an Ubuntu machine that has Jenkins pre-installed. For example, you can choose the "Ubuntu Server 22.04 LTS (HVM), SSD Volume Type".

Configure the instance details, such as the instance type, VPC, and subnet.


Add storage to the instance if needed.
In the "Advanced Details" section, add the User Data script to install Jenkins and Docker on the instance during launch. The User Data script can include commands to install Jenkins and any required dependencies and review instance details and launch the instance.

 #!/bin/bash

 #Install Jenkins
 #Jenkins requires Java to run, so first install Java -->
 #!bin/bash
 sudo apt-get update -y
 sudo apt install openjdk-17-jre -y

 curl -fsSL https://pkg.jenkins.io/debian-stable/jenkins.io-2023.key | sudo tee /usr/share/keyrings/jenkins-keyring.asc > /dev/null
 echo deb [signed-by=/usr/share/keyrings/jenkins-keyring.asc] https://pkg.jenkins.io/debian-stable binary/ | sudo tee /etc/apt/sources.list.d/jenkins.list > /dev/null
 sudo apt-get update -y
 sudo apt-get install jenkins -y
 sudo systemctl start jenkins
 sudo systemctl enable jenkins

 #Install Docker
 sudo apt-get update -y
 sudo apt-get install docker.io -y
 sudo usermod -aG docker $USER
Once the instance is launched, wait for it to show up in the EC2 console and note down its public IP address.
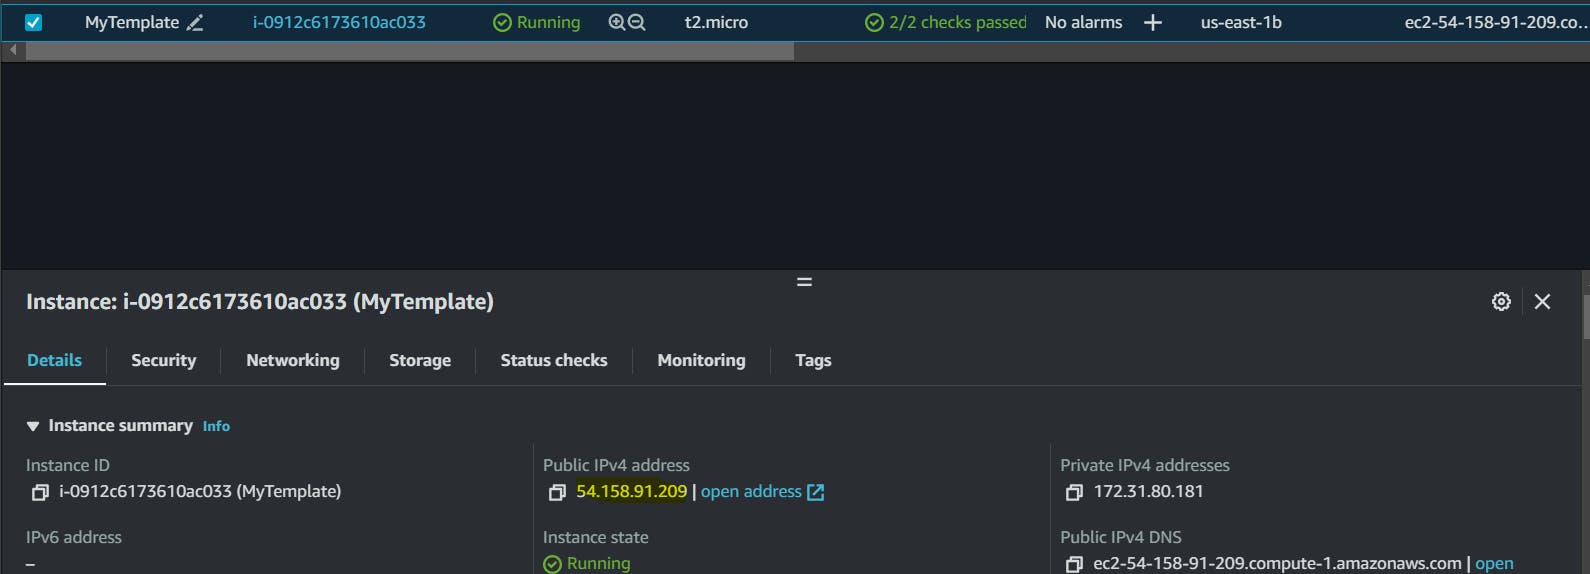
Configure security groups to allow inbound traffic to port 8080 (the default Jenkins port). I am opening all traffic here.

Open a web browser and enter the public IP address followed by ":8080" (e.g., http://<public_ip_address>:8080).

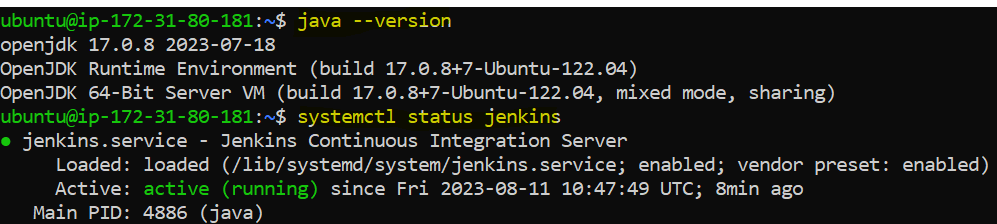
We can confirm the same on the command line interface. We can see java, Jenkins and Docker is installed and running properly.

✅Task2:
- Read more on IAM Roles and explain the IAM Users, Groups, and Roles.
IAM Users: IAM users are entities that represent individual people or applications that interact with your AWS resources. When you create an IAM user, you assign them a unique set of credentials (access key ID and secret access key) that they can use to authenticate themselves when making API calls or using the AWS Management Console. IAM users have their access permissions, which can be customized to grant or restrict access to specific AWS services and resources.
IAM Groups: IAM groups are collections of IAM users. Instead of assigning permissions to each IAM user individually, you can create groups and assign the necessary permissions to the groups. This makes it easier to manage access permissions across multiple users who share similar responsibilities or require the same level of access to resources. By adding or removing users from a group, you can efficiently manage their access permissions. IAM groups do not have their credentials for authentication; they inherit the permissions assigned to the users within the group.
IAM Roles: IAM roles are similar to IAM users, but they are not associated with a specific person or application. Instead, roles are used by AWS services or applications running on AWS resources to obtain temporary access credentials dynamically. Roles are typically used for granting permissions to AWS services or allowing applications within EC2 instances to access other AWS services securely. By attaching an IAM role to an AWS resource, you define what actions the resource can perform and what AWS resources it can access. Roles have policies attached to them, which define the permissions and access control rules.
🚀Create three Roles named: DevOps-User, Test-User, and Admin.
Log into AWS Management Console and navigate to the IAM dashboard. Click on "Roles" in the left-hand menu and then click on the "Create role" button.

Choose the appropriate use case for the role. For example, if you want to create a role for an EC2 instance, choose "AWS service" and then "EC2".

Select the appropriate permissions policies for the role. You can choose from existing policies or create a custom policy.

Enter a name for the role and click "Create role".
🏀Create a DevOps-User role

Repeat the above steps for each role you want to create: Test-User, and Admin.
🏀Create a Test-User role
🏀Create an Admin role
Finally, we can see all the expected roles are created with required policies.

Once the roles are created, you can assign them to individual IAM users or groups as needed, and control their access to AWS resources.
In the next blog post, we will explore more advanced topics in the realm of DevOps. So, stay tuned and let me know if there is any correction.
please feel free to connect.
linkedin.com/in/shubhambmatere
Thank you for reading....................................
Git Hub Repo: https://github.com/ShubhamBMatere/90DaysOfDevOps/blob/master/2023/day39/tasks.md
Thank you for reading!