

Hello Learners,
Welcome to day 38 of the #90DaysOfDevOps challenge initiated by Shubham Londhe . In my previous blogs, I have learned about Kubernetes. From today we will start learning AWS services useful for DevOps engineers. In this blog, I will focus on AWS Identity And Access Management (IAM). Let's get started!
AWS:
Amazon Web Services (AWS) is a comprehensive cloud computing platform offered by Amazon that provides a wide range of services and tools for building and managing cloud-based applications and infrastructure. AWS offers a broad set of infrastructure services, such as computing power, storage options, and networking capabilities, as well as higher-level application services, such as databases, analytics, and machine learning. AWS enables organizations to quickly and easily deploy and manage their applications in a flexible, scalable, and cost-effective way, without having to invest in and maintain their infrastructure. AWS is used by millions of customers worldwide, ranging from startups and small businesses to large enterprises and government agencies.
IAM:
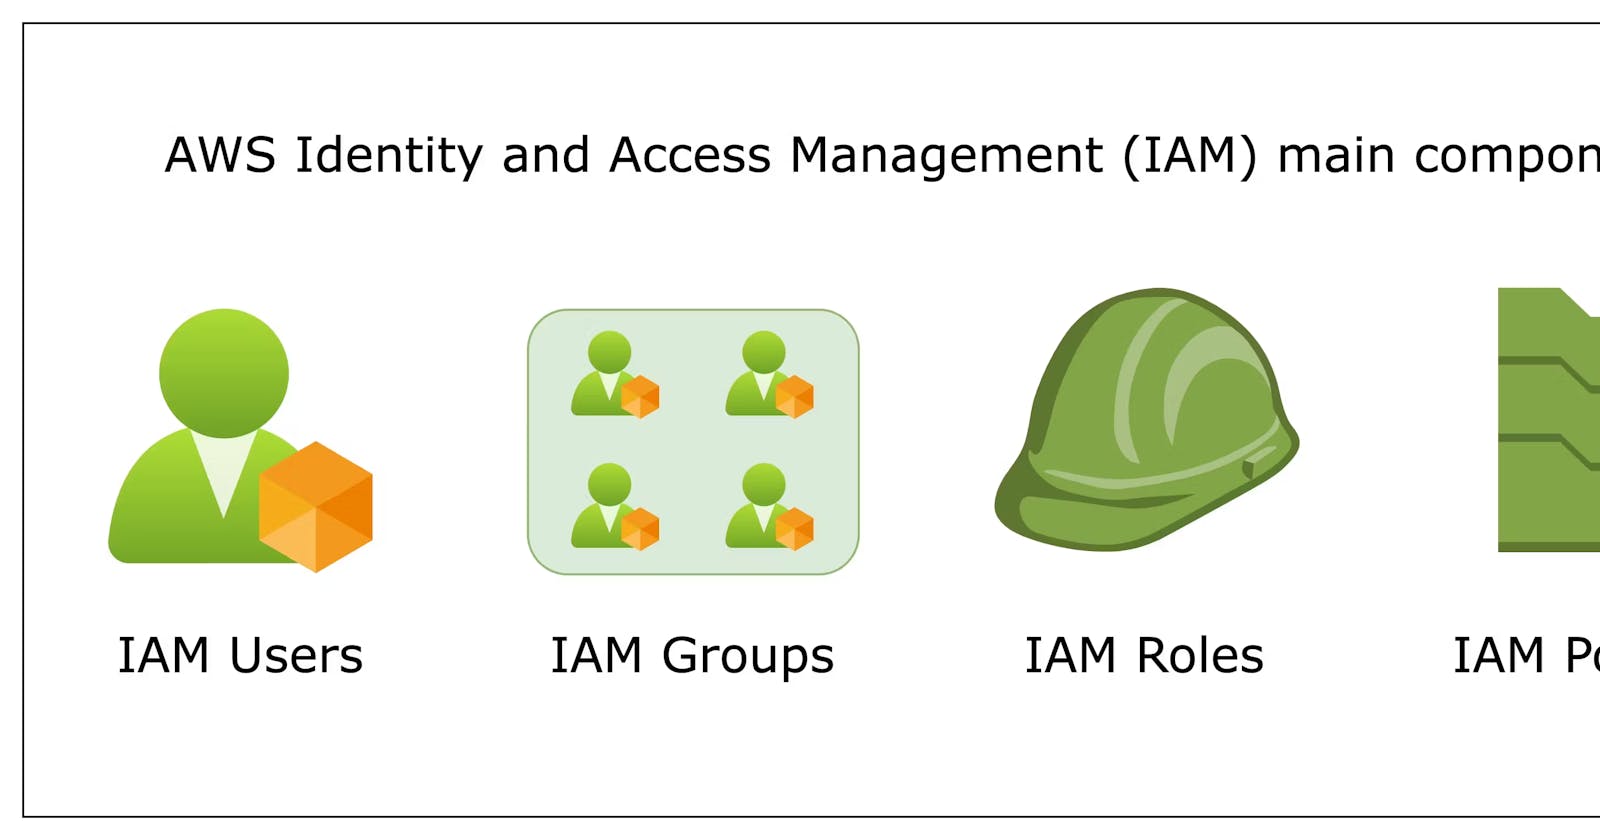
AWS Identity and Access Management (IAM) is a web service that helps you securely control access to AWS resources. With IAM, you can centrally manage permissions that control which AWS resources users can access. You use IAM to control who is authenticated (signed in) and authorized (has permissions) to use resources.
📚Task1:
Create an IAM user with the username of your wish and grant EC2 Access. Launch your Linux instance through the IAM user that you created now and install Jenkins and Docker on your machine via a single Shell Script.
✅To create an IAM user with EC2 access, follow these steps:
Log in to the AWS Management Console.
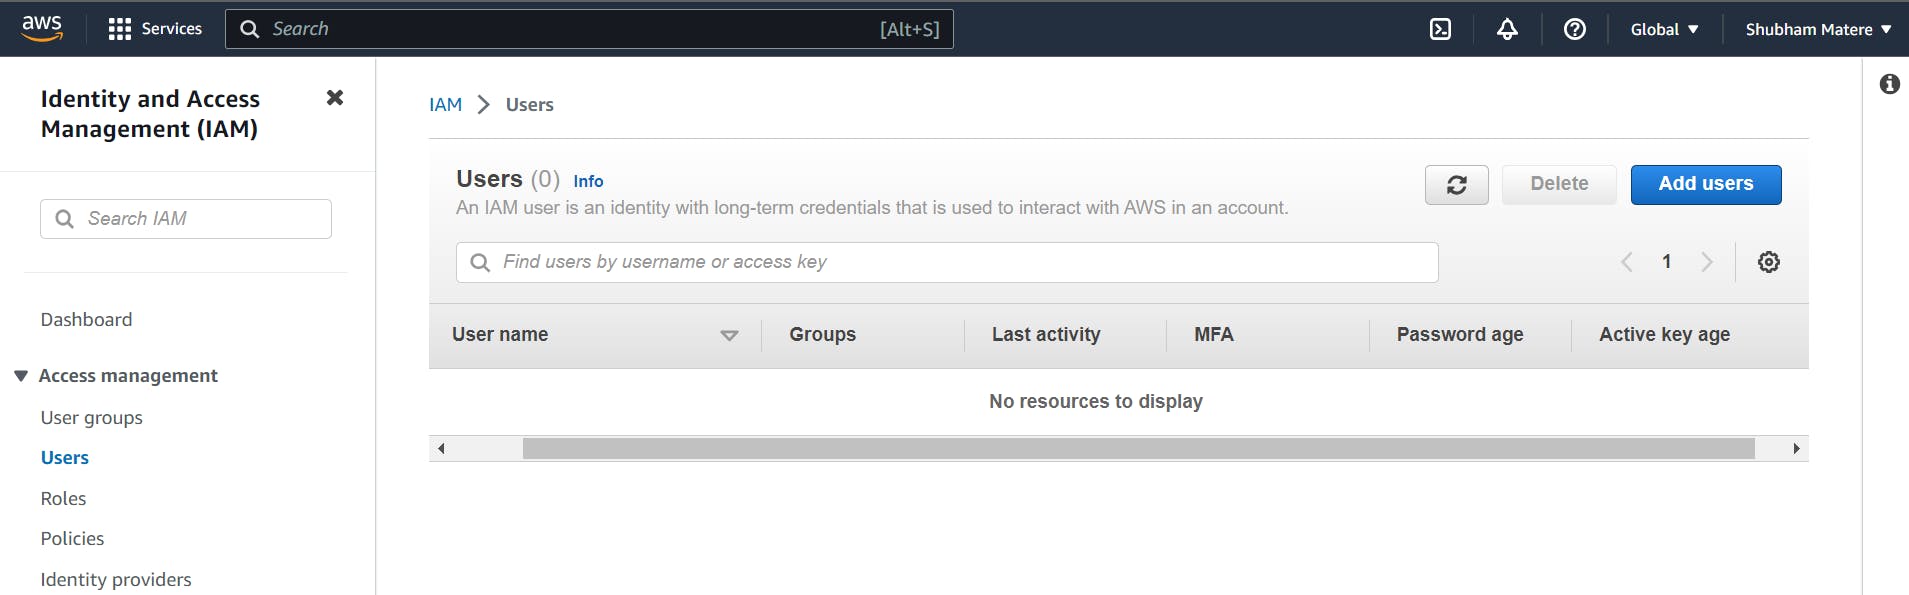
Go to the IAM service and click on "Users" in the left menu.
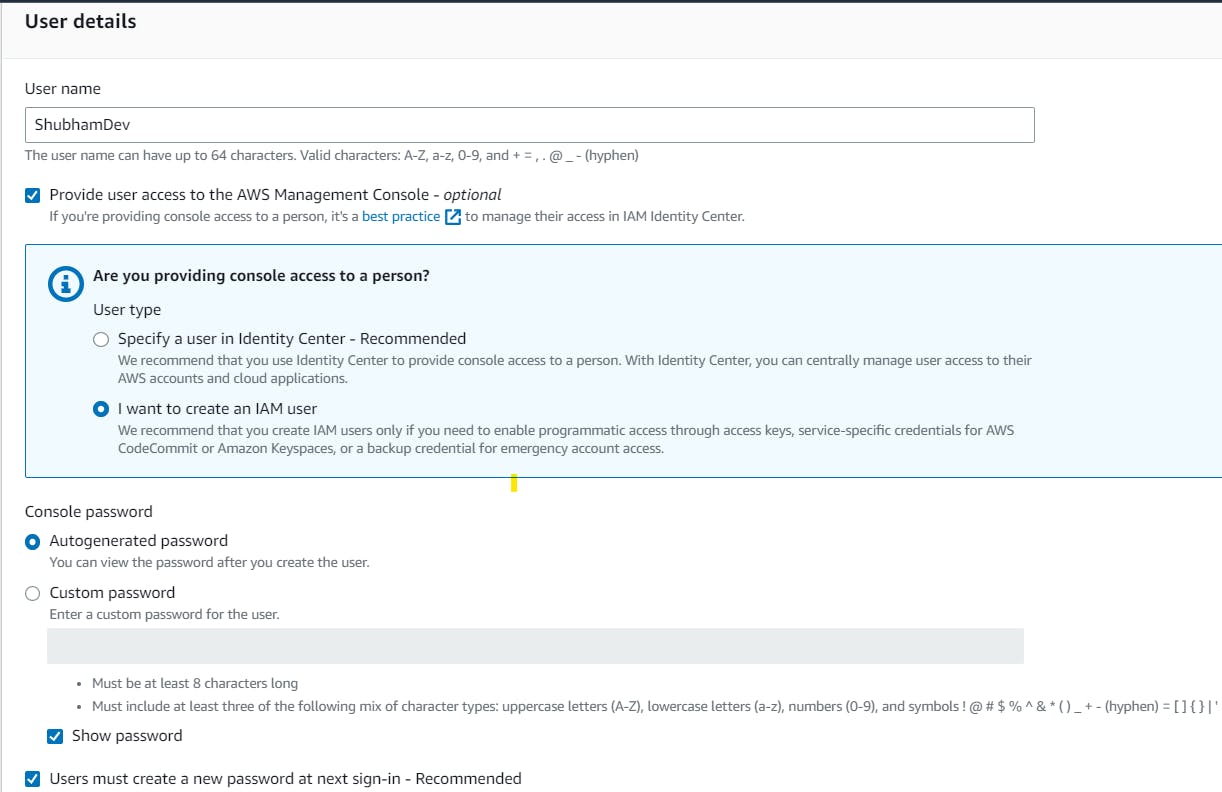
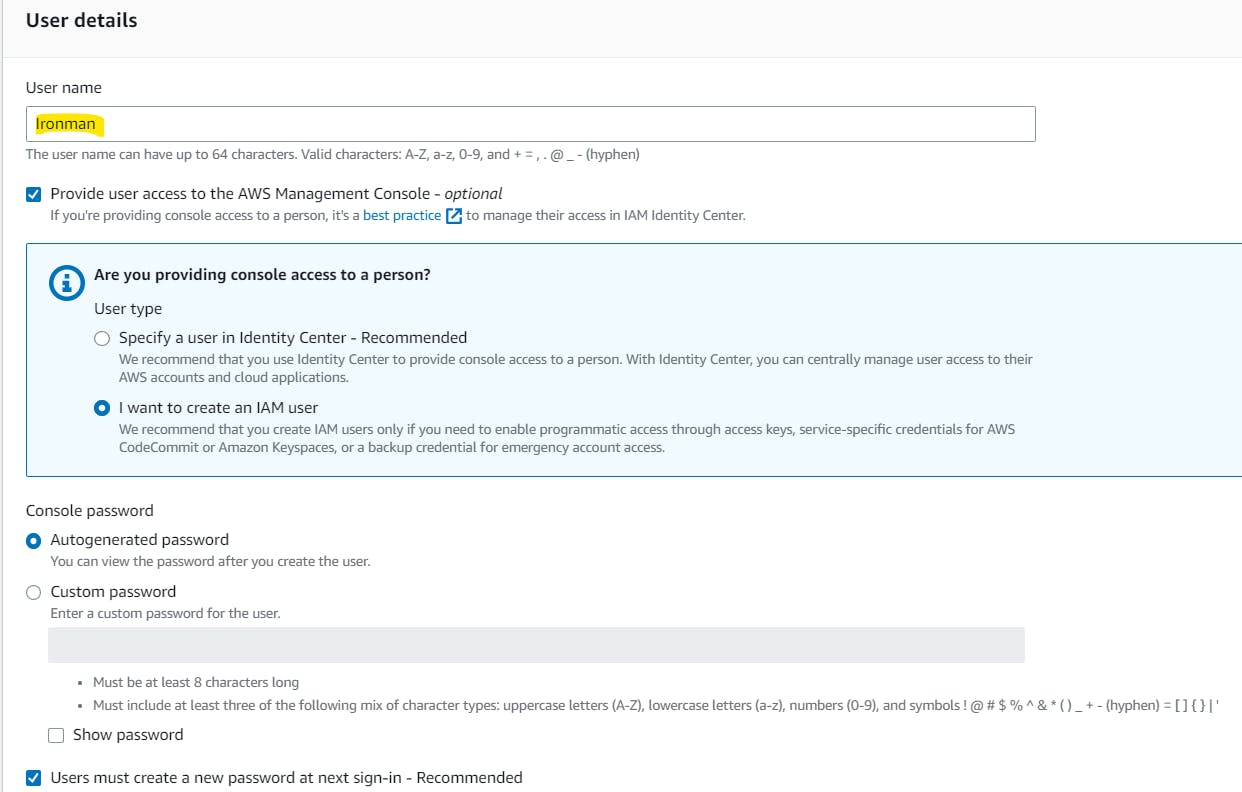
Click on "Add user" and enter a username of your choice.
Select "Programmatic access" and click "Next".
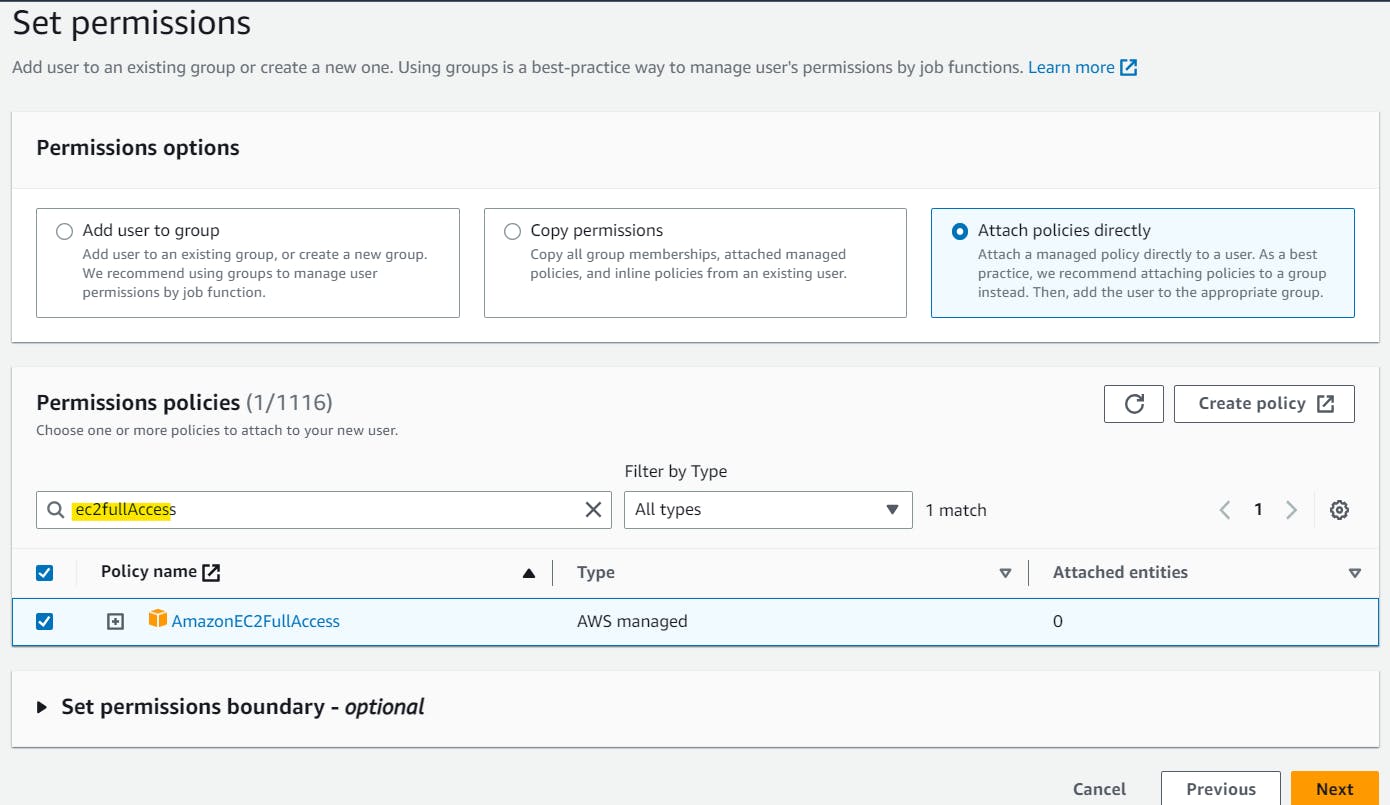
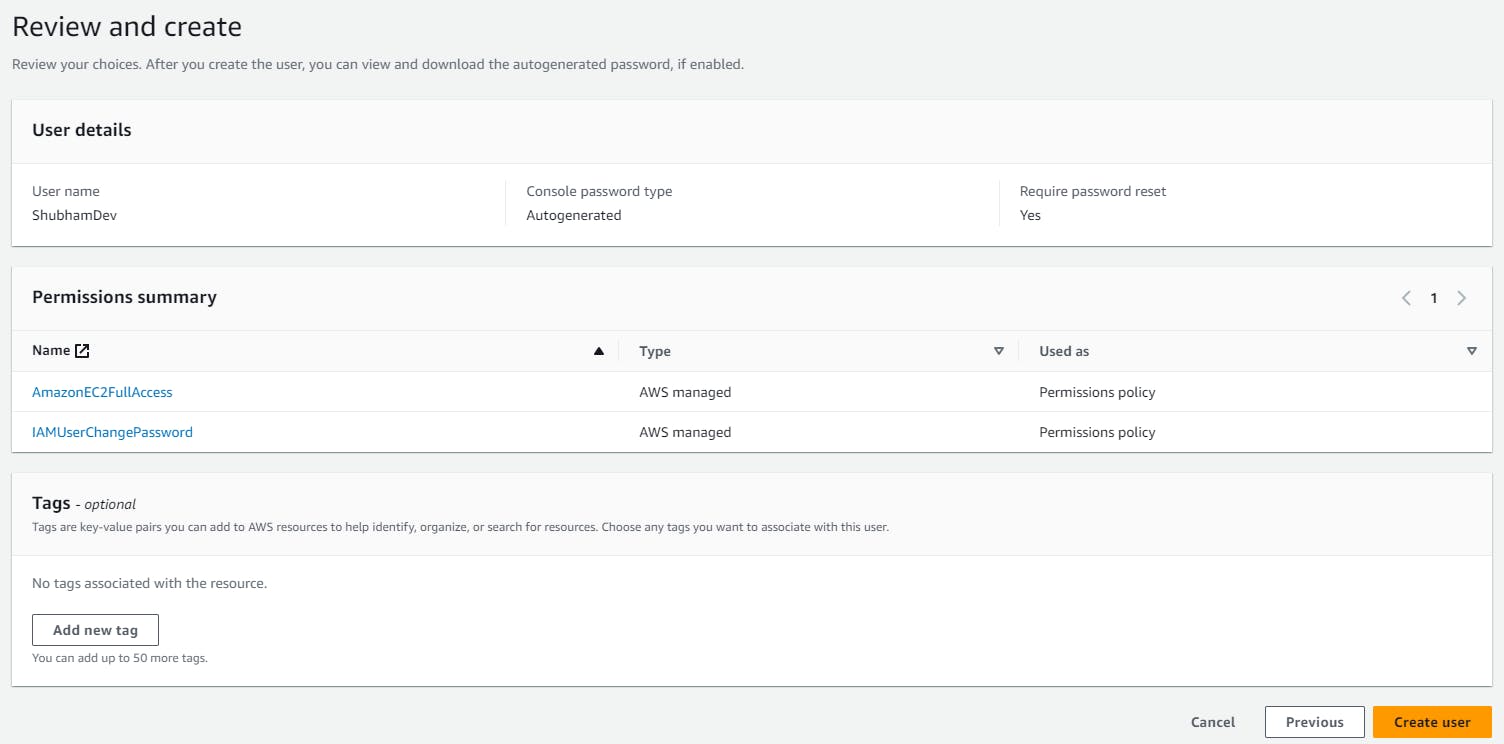
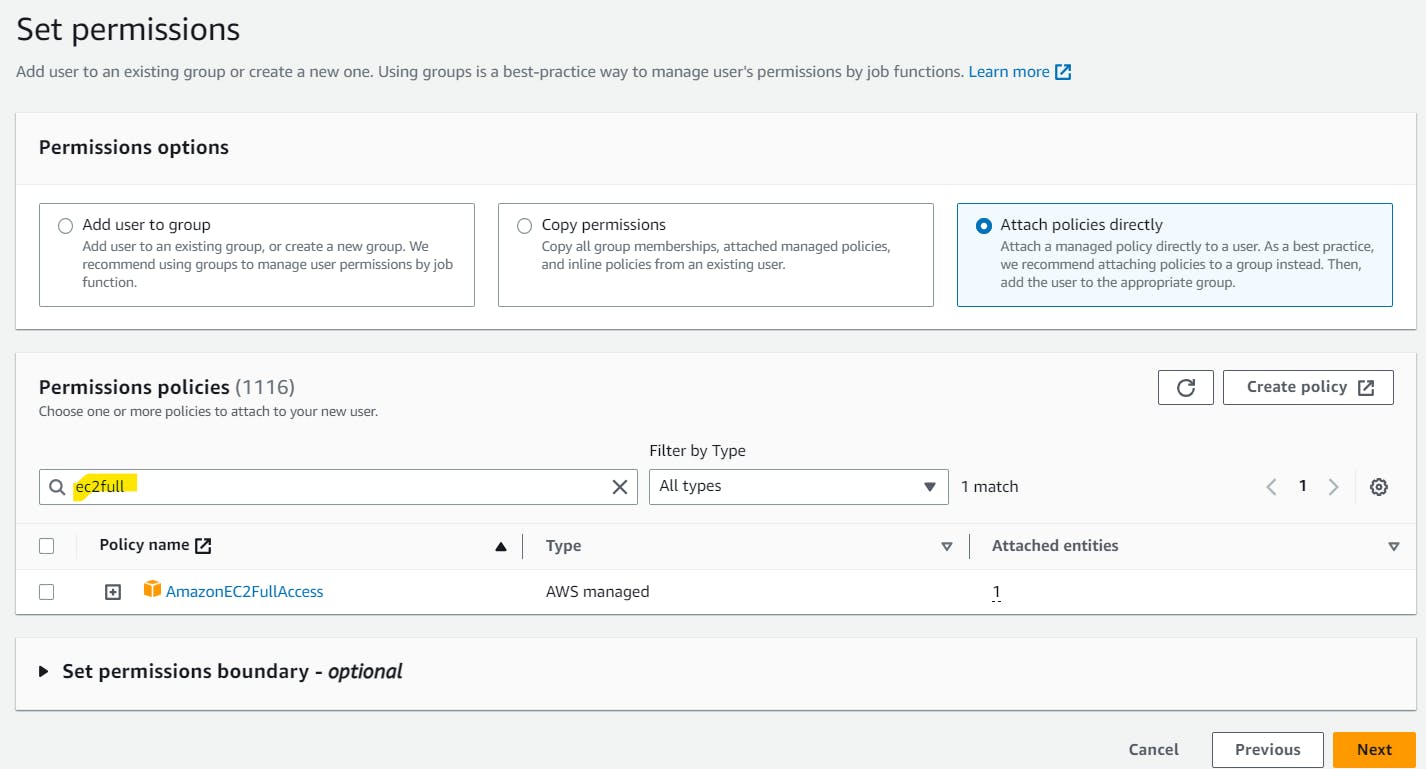
Select "Attach existing policies directly" and select the policy "AmazonEC2FullAccess". You can search EC2FullAccess in the search window to find the policy.
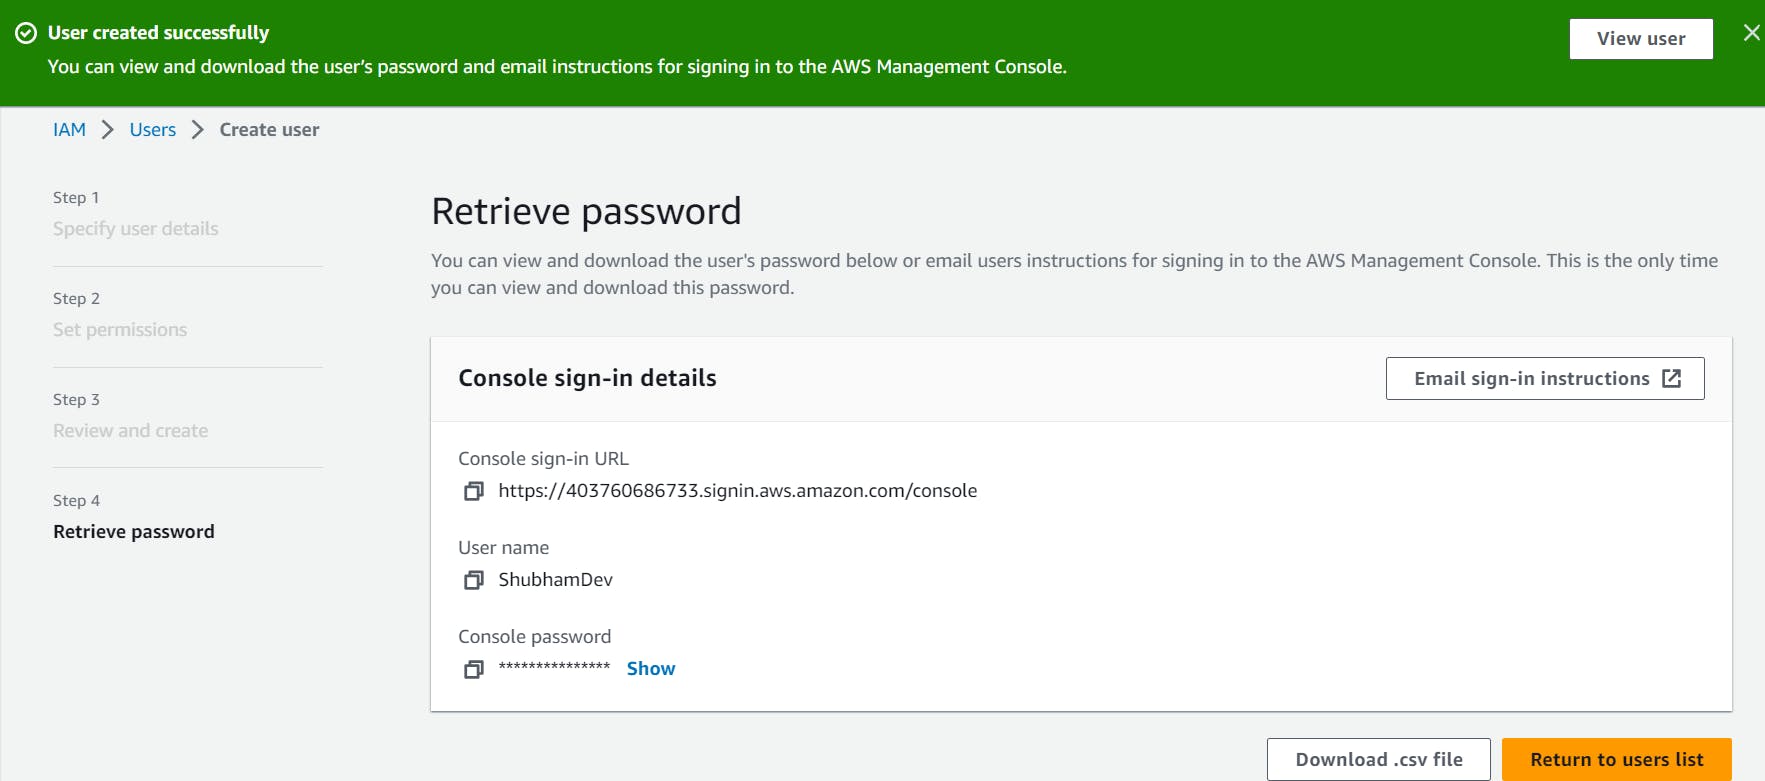
Take note of the username and password, as you will need these to authenticate your IAM user when launching instances.
To launch a Linux instance using your IAM user, follow these steps:
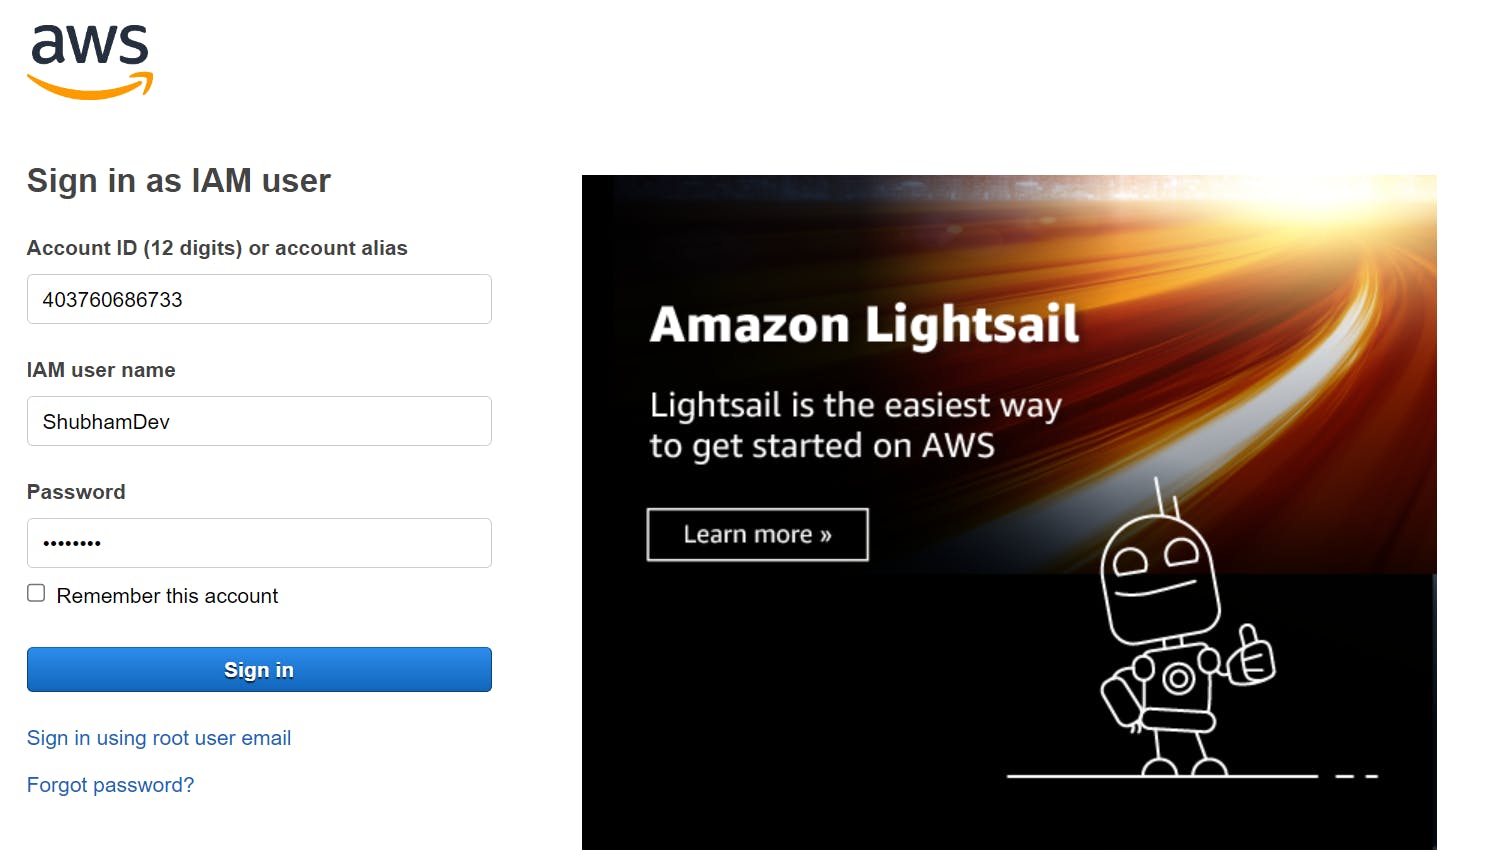
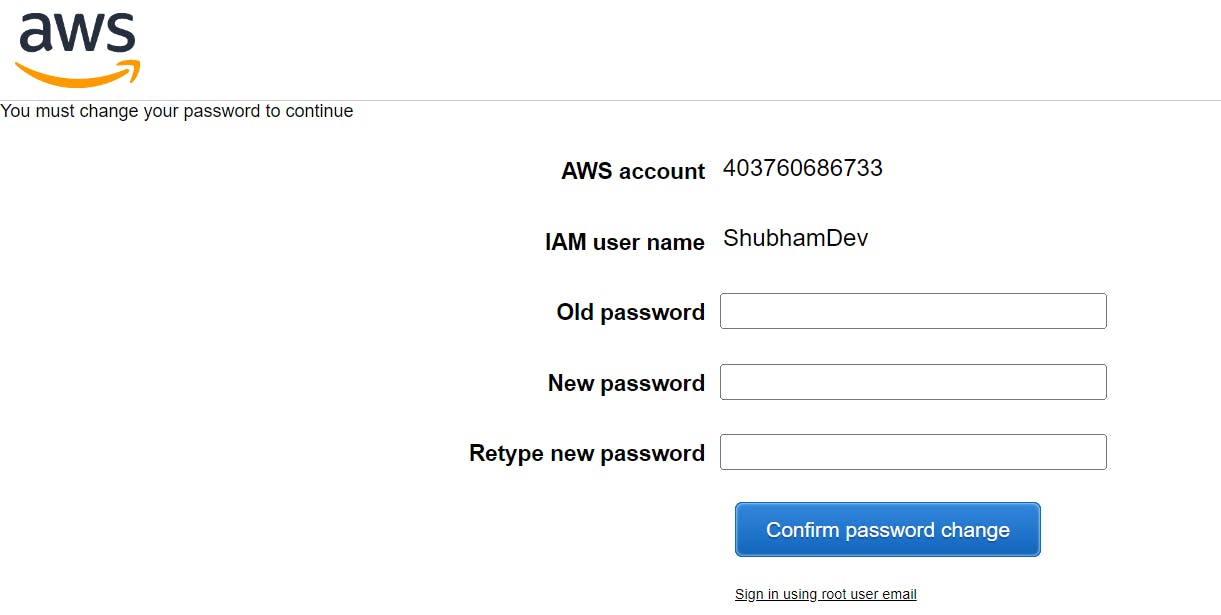
Sign in AWS account as an IAM user which we created above.
On sign in it will ask to change your password.
Go to the EC2 service and click on "Launch instance".
Choose a Linux AMI.
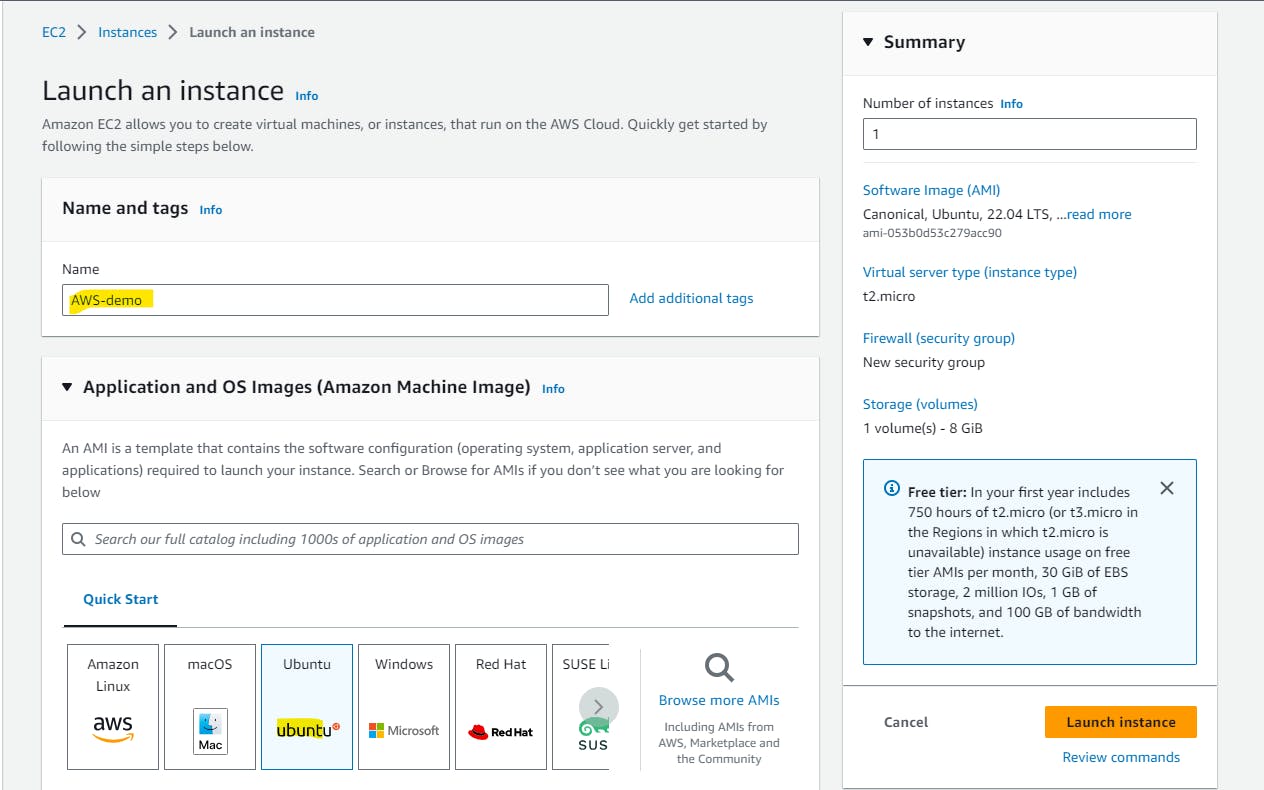
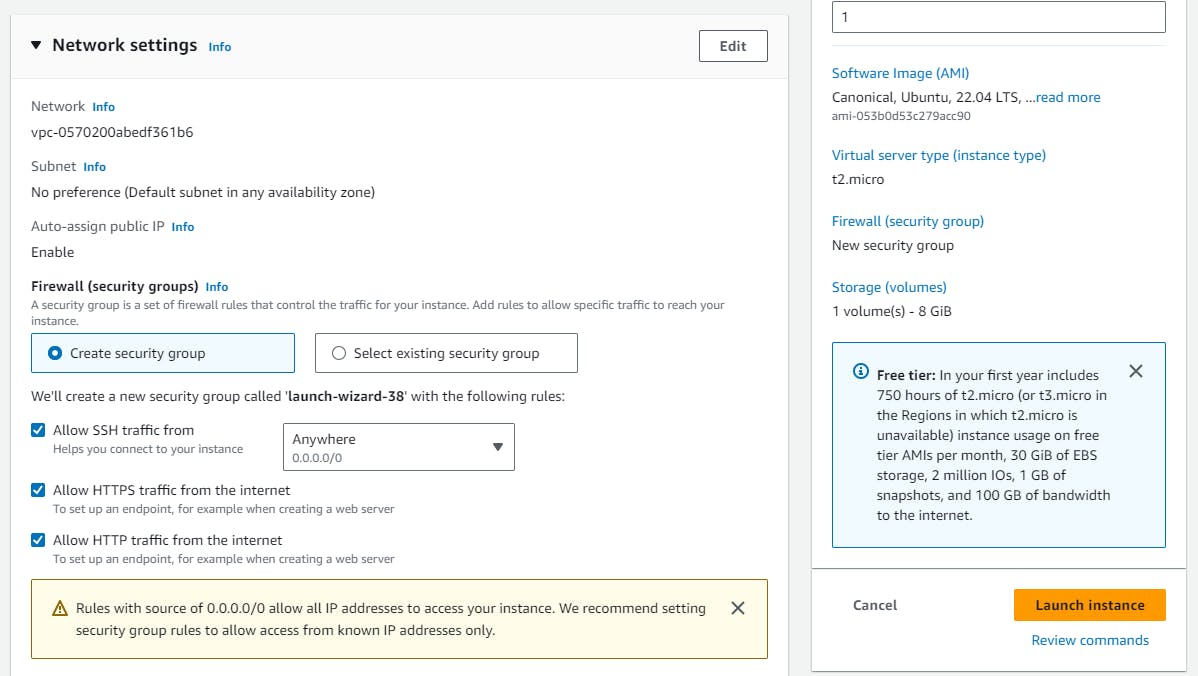
Select an instance type t2.micro and create a new key pair.

Click on Launch instance
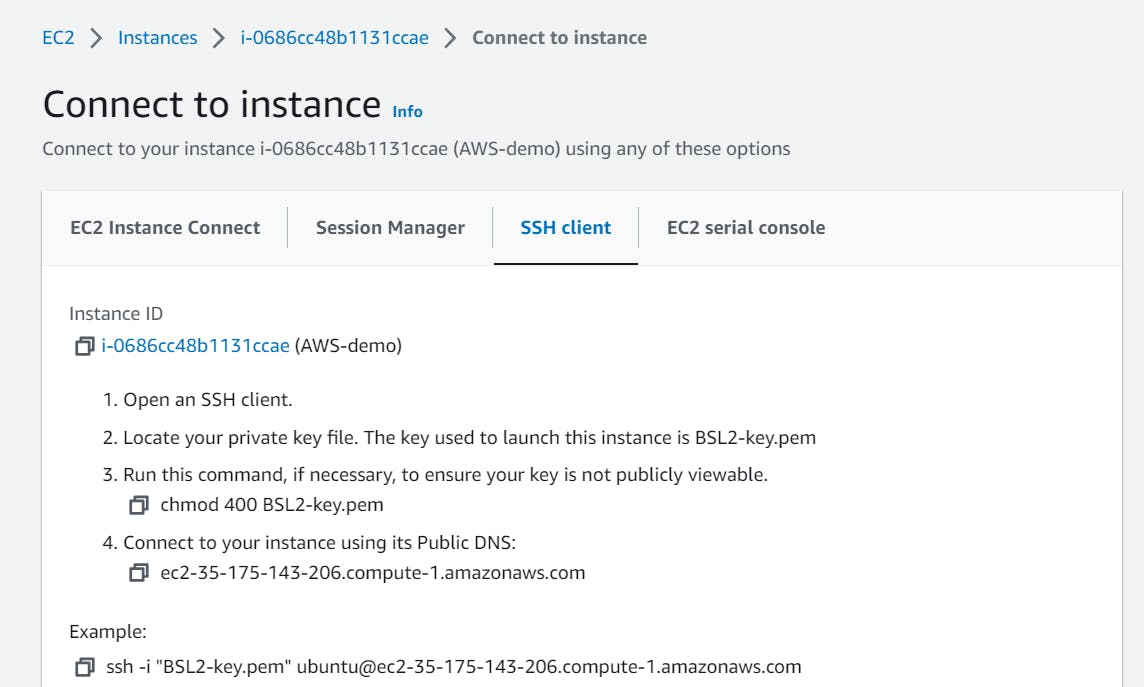
Log in ec2 instance using SSH client. Go to the command prompt and paste the below command at the location where your public key is downloaded.

Install Jenkins and Docker on your machine via a single Shell Script.

 #!/bin/bash
 sudo apt-get update
 sudo apt install openjdk-17-jre -y

 curl -fsSL https://pkg.jenkins.io/debian-stable/jenkins.io-2023.key | sudo tee /usr/share/keyrings/jenkins-keyring.asc > /dev/null
 echo deb [signed-by=/usr/share/keyrings/jenkins-keyring.asc] https://pkg.jenkins.io/debian-stable binary/ | sudo tee /etc/apt/sources.list.d/jenkins.list > /dev/null
 sudo apt-get update
 sudo apt-get install jenkins -y

 sudo systemctl start jenkins
 sudo systemctl enable jenkins

 sudo apt-get update
 sudo apt-get install docker.io -y
 sudo systemctl start docker
 sudo systemctl enable docker
Check Docker and Jenkins versions.

📚Task2:
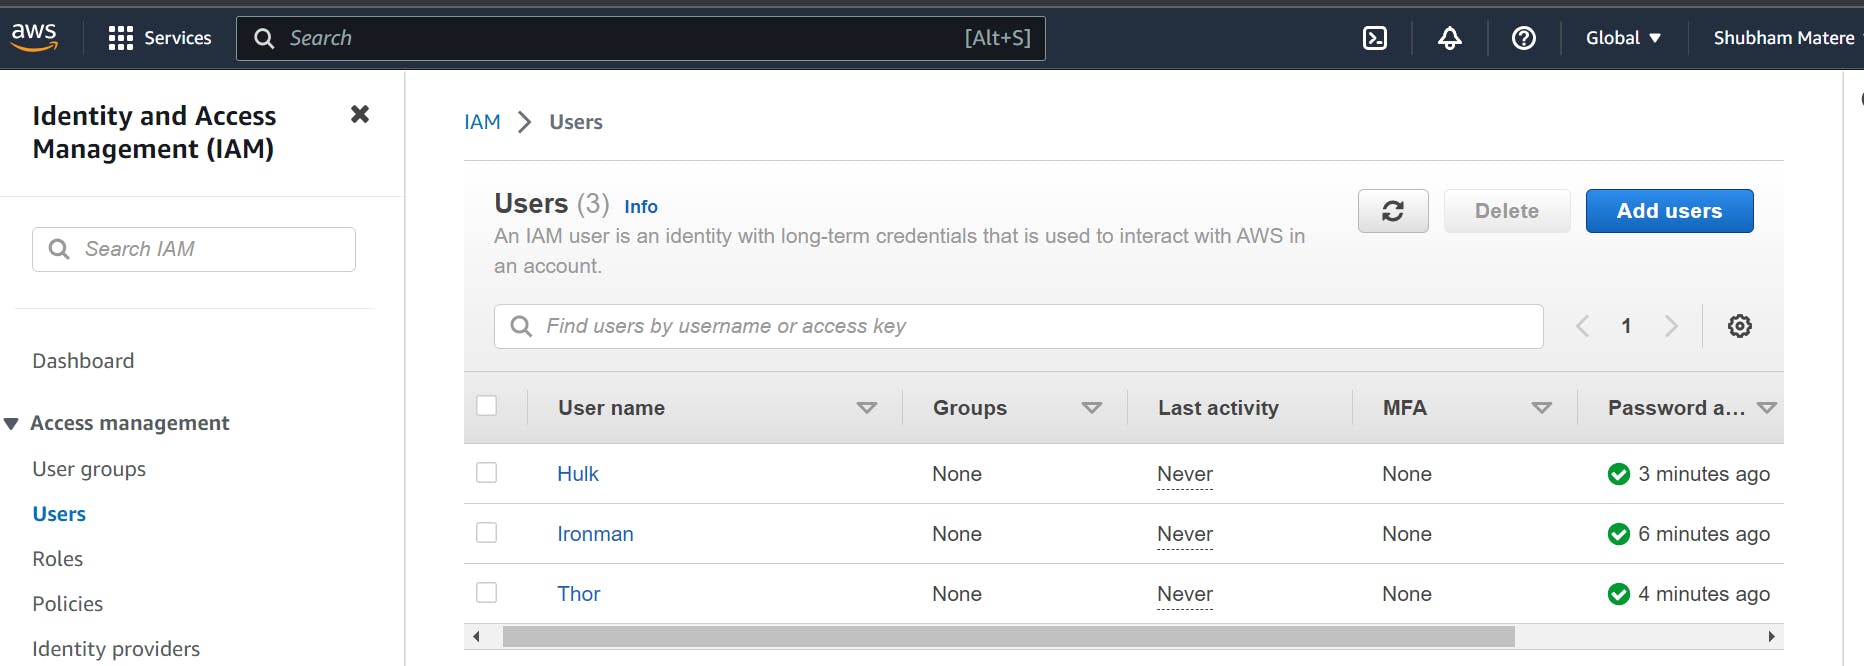
In this task, we need to prepare a DevOps team of Avengers. Create 3 IAM users of Avengers and assign them to DevOps groups with the IAM policy.
Create 3 IAM users of Avengers by following the steps explained above.
In this way create any 3 users as follows.
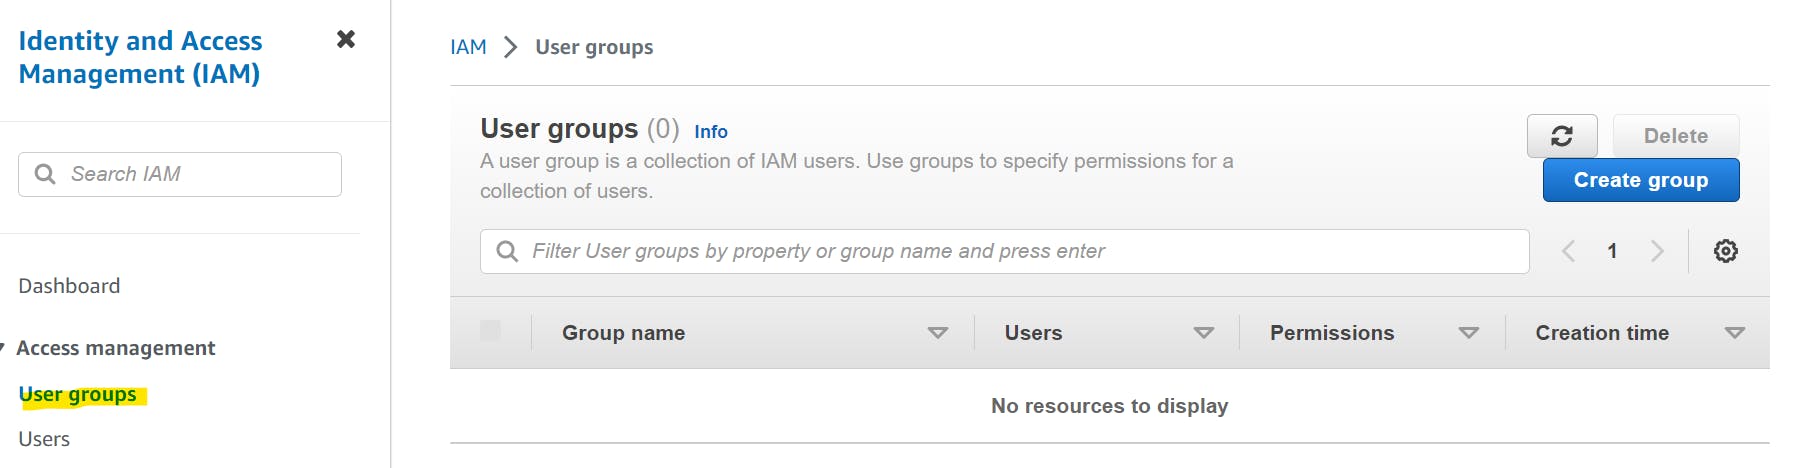
Create an Avengers DevOps group by clicking on the "User Groups" link in the left-hand menu and clicking on the "Create New Group" button.
Enter a name for the group. add the three IAM users to the group by selecting the users.
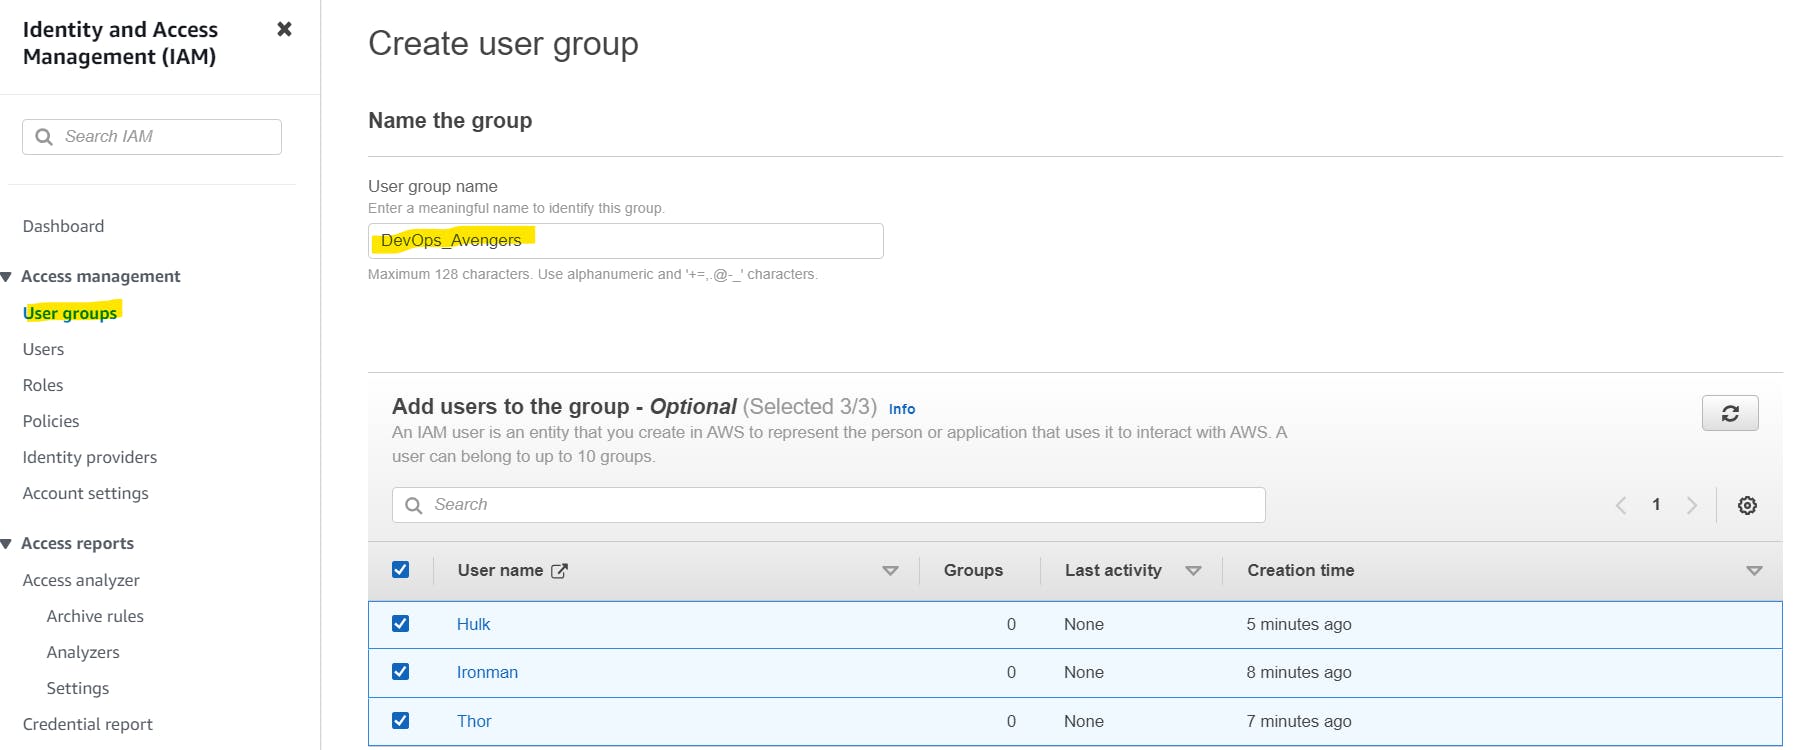
In the "Attach Policy" step, search for and select the "AmazonEC2FullAccess", "AmazonS3FullAccess", and "AmazonRDSFullAccess" policies.
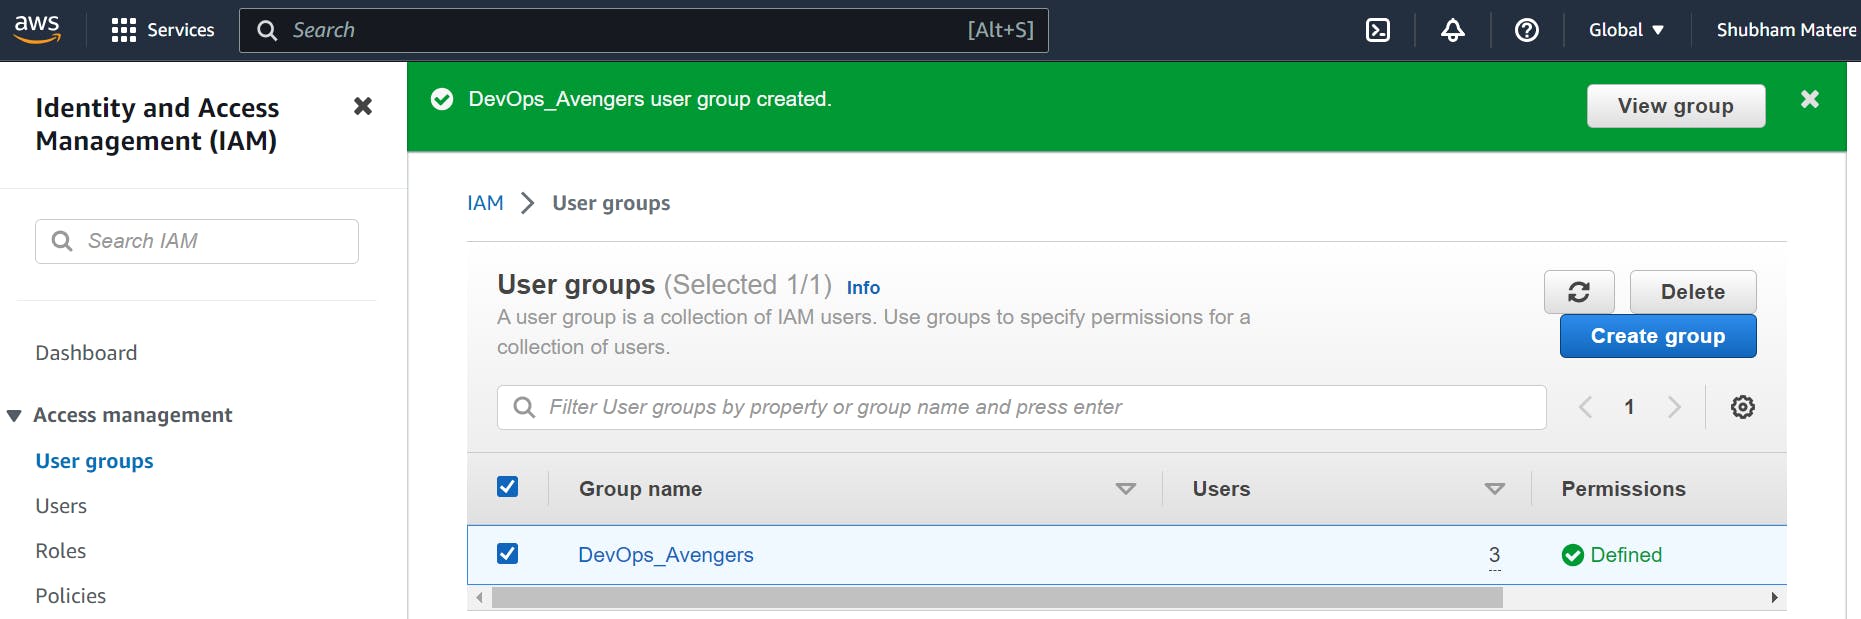
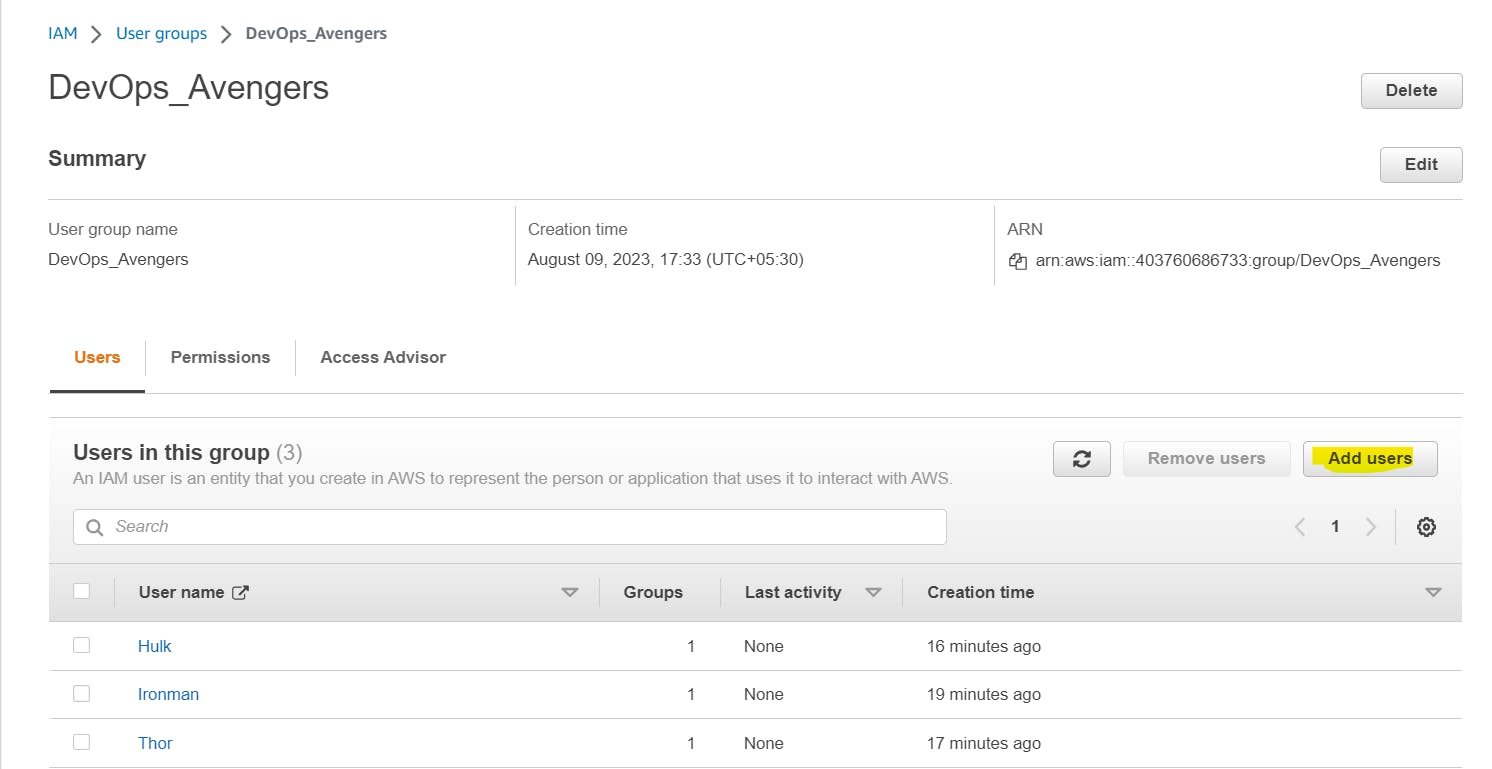
Click on the "Create Group" button and voila! below Group DevOps_Avengers is created with 3 users.
You can add more users by clicking "Add users".
In the next blog post, we will explore more advanced topics in the realm of DevOps. So, stay tuned and let me know if there is any correction.
please feel free to connect.
linkedin.com/in/shubhambmatere
Thank you for reading....................................
Git Hub Repo: https://github.com/ShubhamBMatere/90DaysOfDevOps/blob/master/2023/day38/tasks.md