Deploying a Java Application to Kubernetes using Jenkins, Docker, Maven, Git, and Kubeadm


Hello Learners,
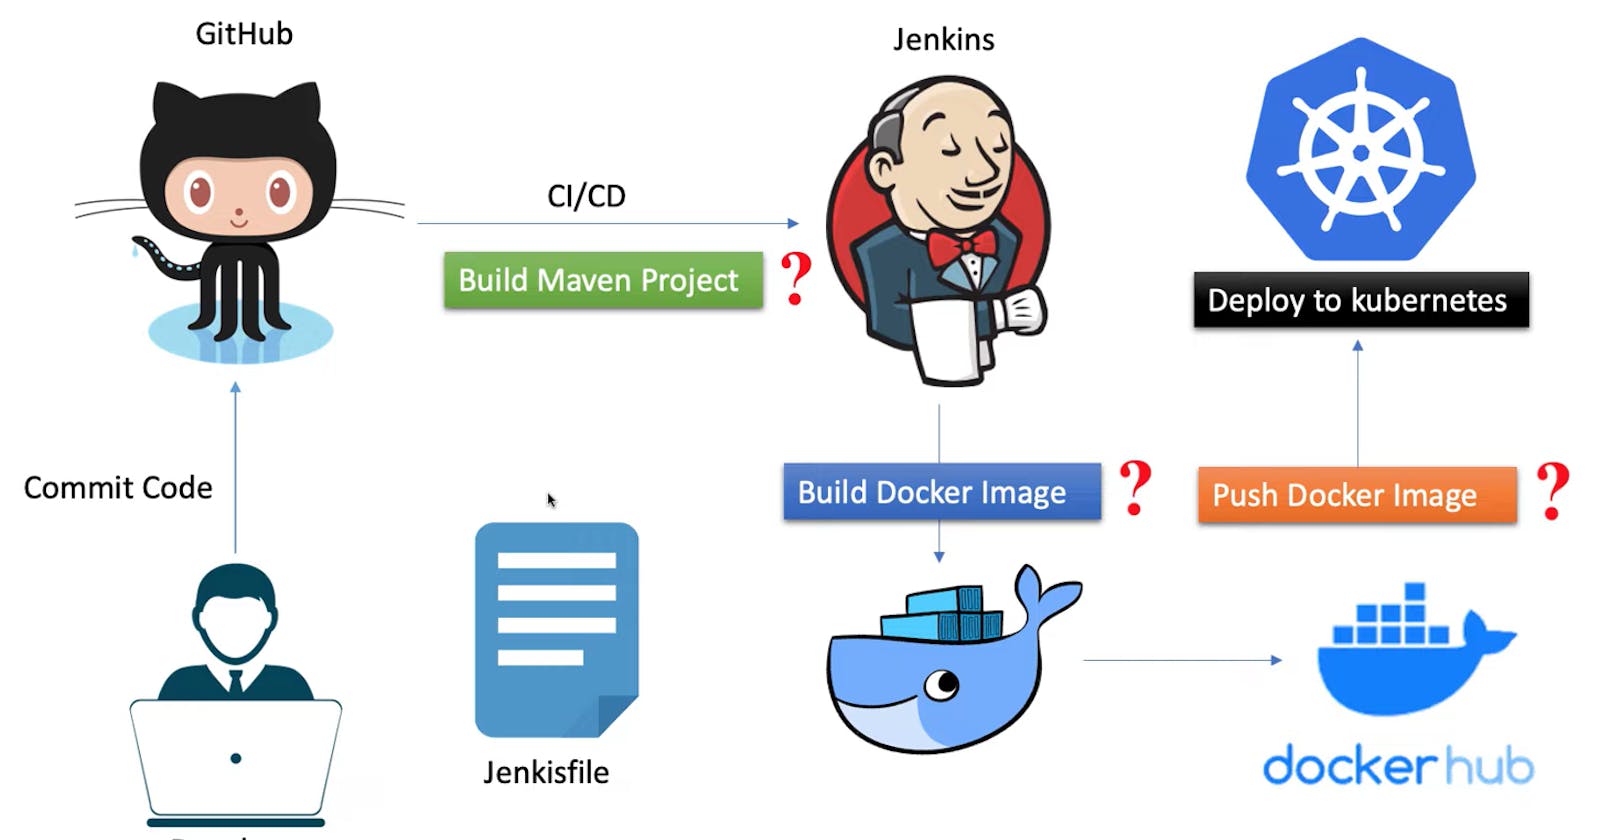
In this blog post, we will walk through a comprehensive step-by-step guide on deploying a Java application to Kubernetes using popular tools such as Jenkins, Docker, Maven, Git, and Kubeadm. We will utilize three instances of Ubuntu on AWS: one for installing Jenkins, Docker, Git, and Maven, and two for setting up a Kubeadm master and a worker node. Additionally, we will cover important steps such as Docker login, creating a Jenkins pipeline, and managing secret text credentials for Docker login and Kubernetes deployment.
Prerequisites: Before we begin, ensure you have the following:
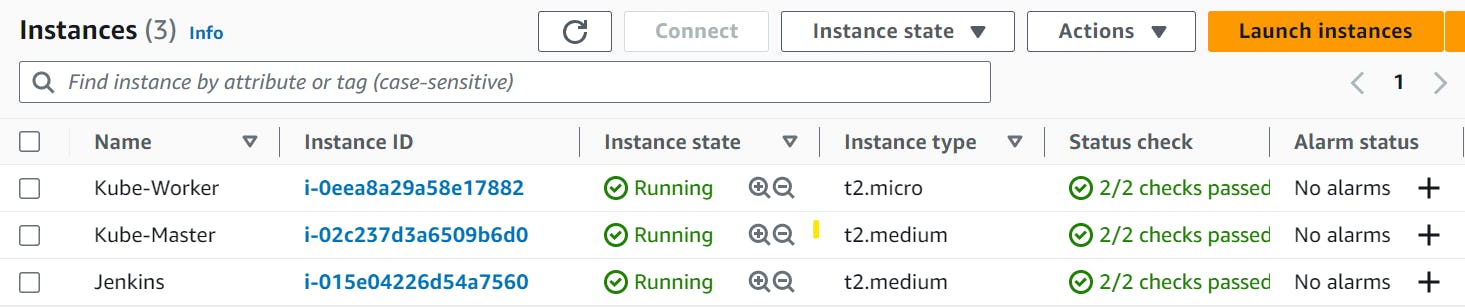
Three instances of Ubuntu on AWS.
Familiarity with Java application development, Git, Docker, and Kubernetes concepts.
A demo java application. You can check my GITHUB REPO for reference.
The following are the steps to deploy a Java application on K8s:
Step 1: Setting up the Jenkins Server.
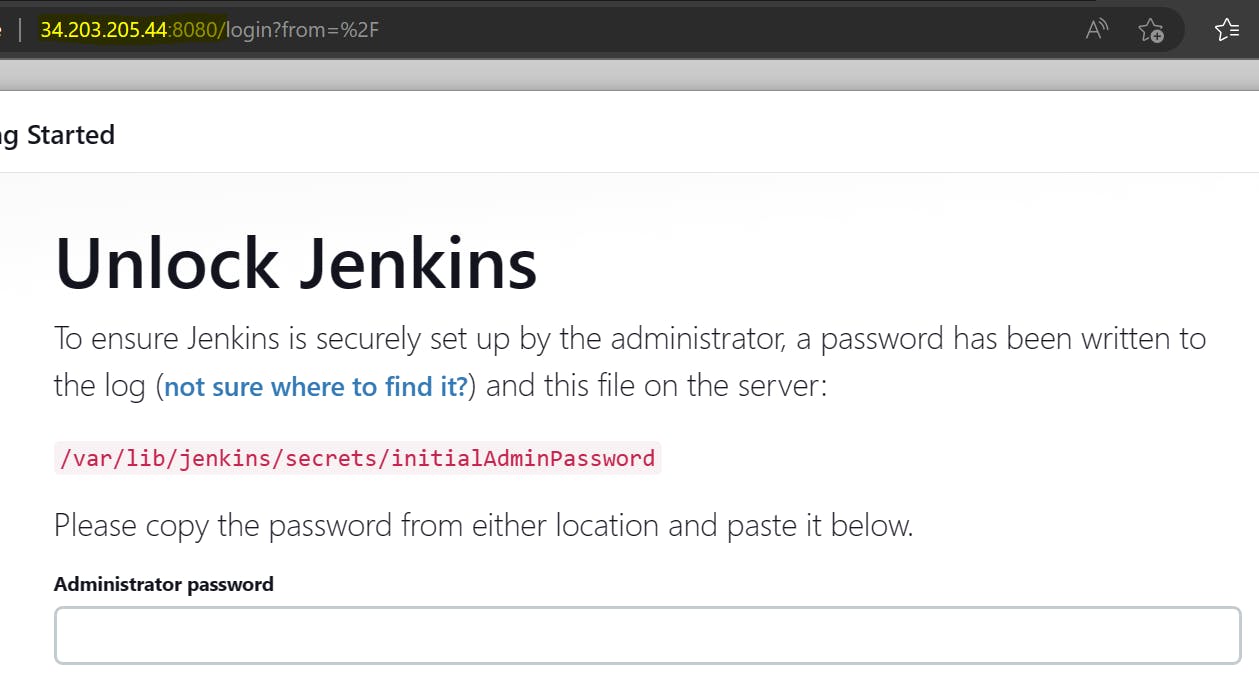
Launch an Ubuntu instance on AWS and connect to it using SSH. If you are new to Jenkins, you can follow this step-by-step guide to install Jenkins and get you started.
Access Jenkins using the instance's IP address and obtain the initial admin password.
Step 2: Setting up Git on Jenkins Server
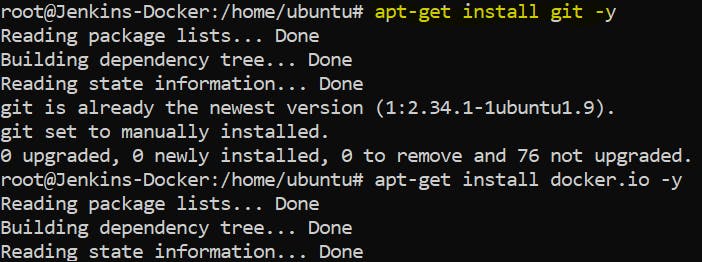
Install Git using the package manager with the following command.
apt-get install git -y
Step 3: Setting up Docker on Jenkins Server and giving the required permissions.
Install docker using the package manager. After the installation of the docker, give all the necessary permissions. After that just restart the docker to ensure all the changes are reflected.

  sudo usermod -aG docker jenkins
  systemctl restart docker
Step 4: Setting up Maven on Jenkins Server.
Install Maven using the package manager.

  apt update
  apt install maven -y
Step 5: Install the necessary Jenkins plugins:
Docker Plugin
Kubernetes Continuous Deploy Plugin. The Jenkins platform is not available, so Kubernetes-cd.hpi you can download it from my GITHUB REPO.
Git Plugin
Maven Integration Plugin: set the maven home by editing tools configuration on Jenkins. you can use the following command to trace maven home on your instance.

- Credentials Binding Plugin
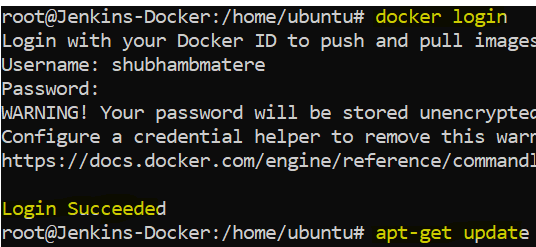
Step 6: Docker login & apt-get update
Step 7: Setting up Kubernetes Cluster
Launch two Ubuntu instances on AWS and connect to them using SSH.
Install Kubeadm, Kubelet, and Kubectl on both instances by following the official Kubernetes documentation for Ubuntu.
On the first instance, initialize the Kubernetes master. If you want to no more about how to set up a Kubernetes cluster, you can follow my post on a step-by-step guide to setup a Kubernetes cluster.
On Master, we can check.

On the Worker node, we can see.

Step 8: Configuring Jenkins for Docker and Kubernetes
Configure Docker credentials:
Go to Jenkins dashboard -> Credentials -> System -> Global credentials -> Add Credentials.
Select "Username with password" and provide your Docker Hub credentials.
Save the credentials with an appropriate ID (e.g.,
docker-hub-credentials).
Configure Kubernetes credentials:
Go to Jenkins dashboard -> Credentials -> System -> Global credentials -> Add Credentials.
Select "Secret text" and provide your Kubernetes cluster credentials (e.g.,
kube-config).Save the credentials.
Step 9: Creating a Jenkins Pipeline
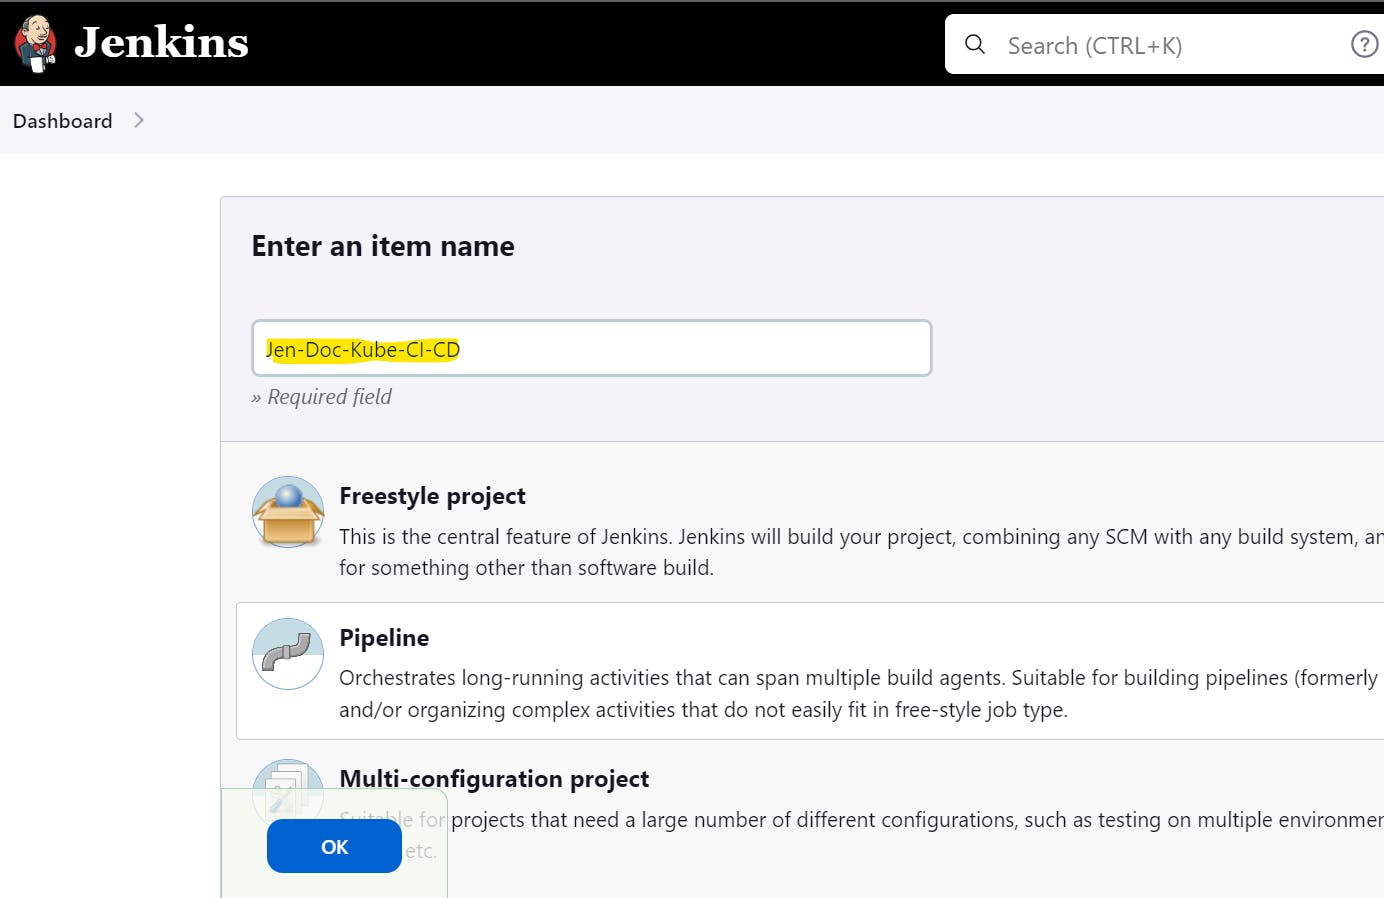
Create a new Jenkins job:
- Go to Jenkins dashboard -> New Item -> Enter a name for your job -> Pipeline.

Configure the pipeline:
Under "Pipeline," select "Pipeline script" and enter the Jenkinsfile script. For reference, you can check my Jenkinsfile
The Jenkinsfile should include stages for cloning the Git repository, building the Java application using Maven, building the Docker image, pushing the image to the Docker Hub and deploying to Kubernetes.
Use the Docker and Kubernetes credentials previously configured in the pipeline script.
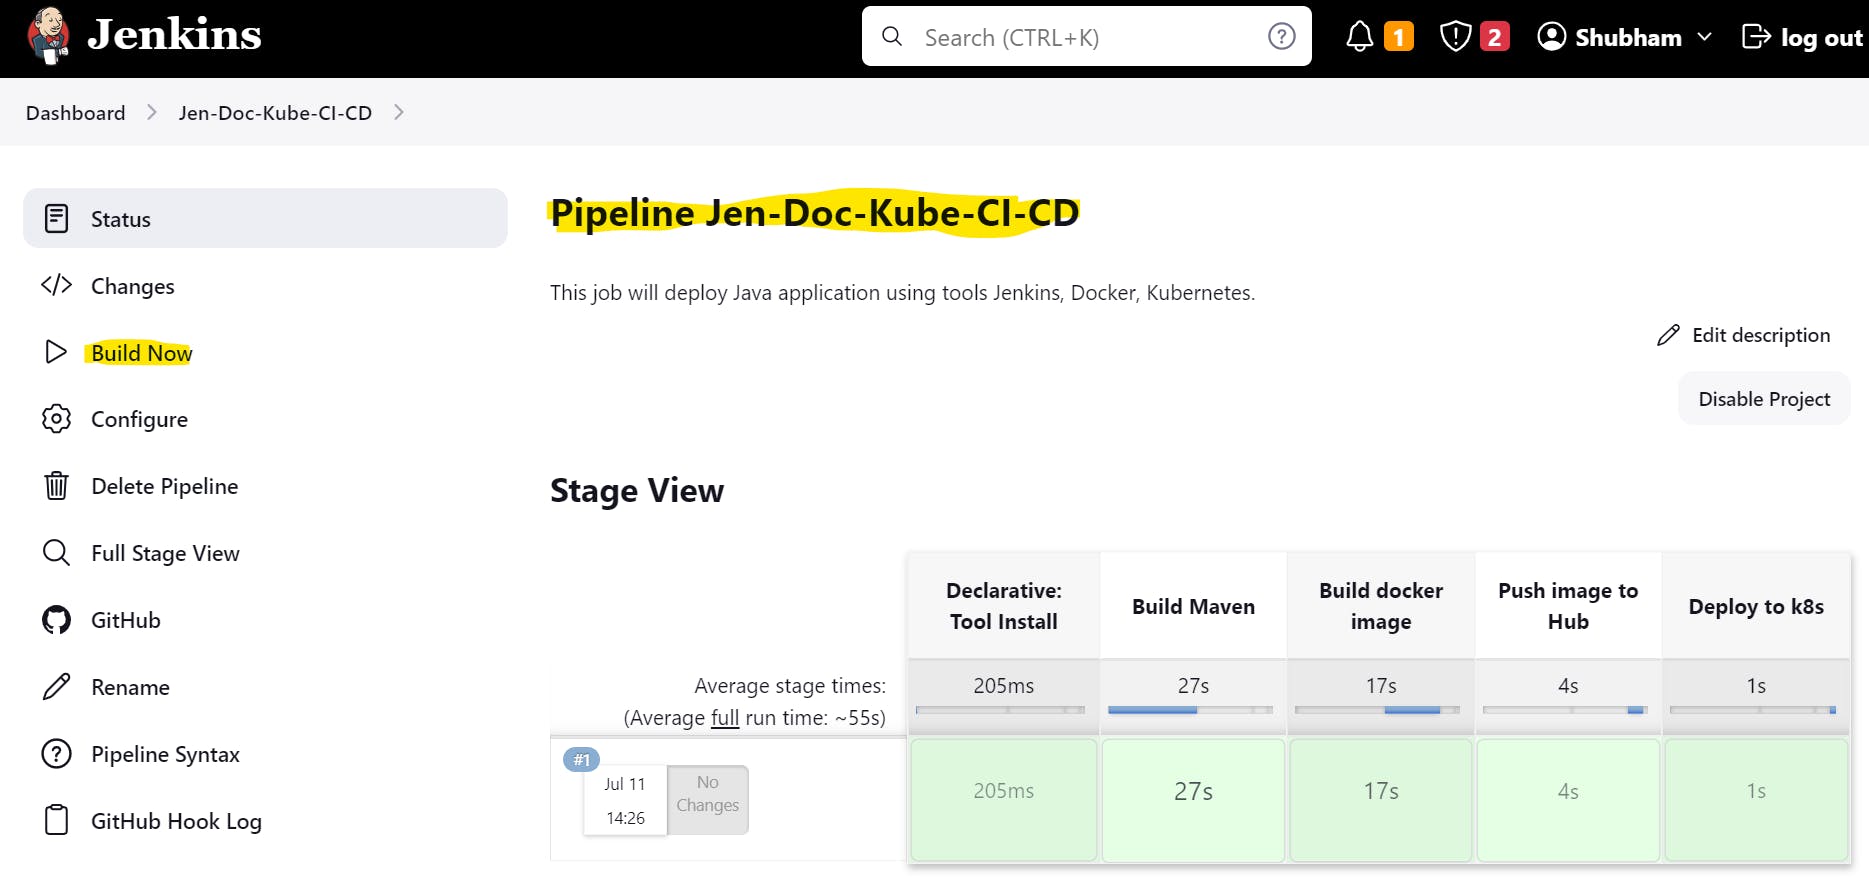
Step 10: Deploying the Java Application to Kubernetes
Run the Jenkins job:
Click on "Build Now" in the Jenkins job.
The pipeline script will trigger the build process, including Git clone, Maven build, Docker image creation, and Kubernetes deployment.
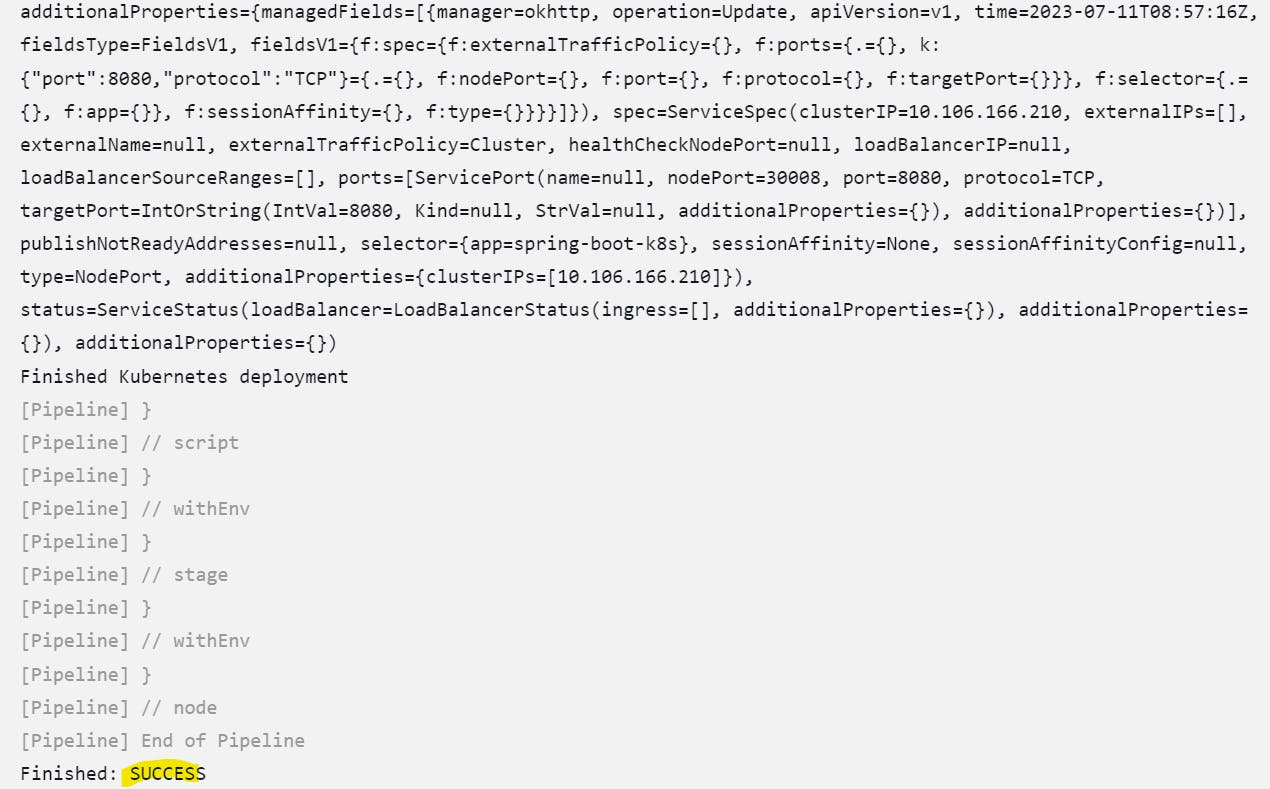
Check the Jenkins console output for any errors or issues.
- Verify the Java application deployment:
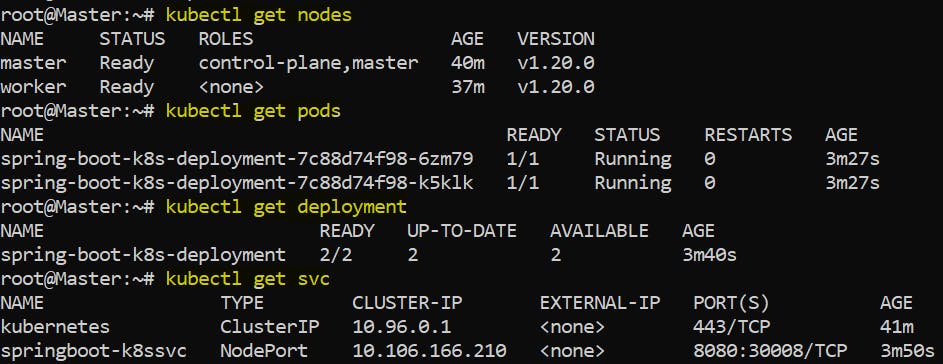
Use the Kubernetes command-line tools (
kubectl) to check the status of pods, deployments, and services.kubectl get nodes kubectl get pods kubectl get deployment kubectl get svc
- Access the application using the assigned Kubernetes service's IP or hostname.

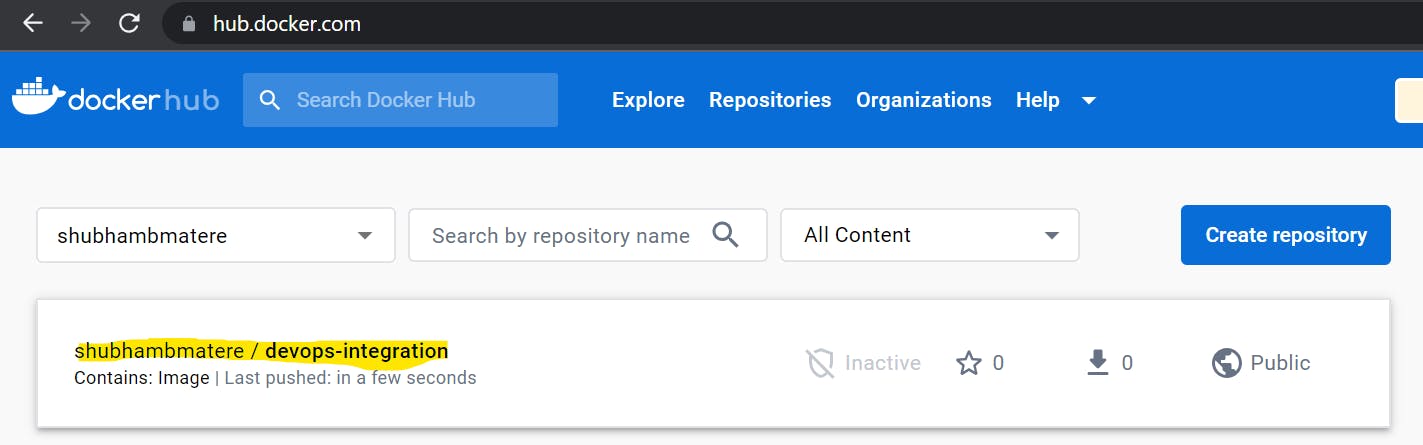
- Also, we can check on Docker Hub whether our latest image is pushed or not by signing in to Docker Hub.
- Also, we can check on our worker node whether the repository was created or not.

Conclusion: Congratulations! You have successfully deployed a Java application to Kubernetes using Jenkins, Docker, Maven, Git, and Kubeadm. Throughout this guide, we covered the installation and configuration of Jenkins, Docker, Git, and Maven on an Ubuntu instance, as well as setting up a Kubernetes cluster with a master and a worker node. We also explored creating a Jenkins pipeline and managing credentials for Docker login and Kubernetes deployment. By following these steps, you can automate the deployment process and streamline your Java application deployments on Kubernetes.
If this post was helpful, please do follow. I am sharing my LinkedIn profile below, please feel free to connect.
linkedin.com/in/shubhambmatere
Java app used in project: https://github.com/ShubhamBMatere/devops-automation/tree/main
Thank you for reading...see you soon..