Day 23 : Beginner level Jenkins Freestyle Project


Table of contents
What are Freestyle Projects?
A freestyle project in Jenkins is a type of project that allows you to build, test, and deploy software using a variety of different options and configurations. Here are a few tasks that you could complete when working with a freestyle project in Jenkins:
Task-01
Create a new Jenkins freestyle project for your app.
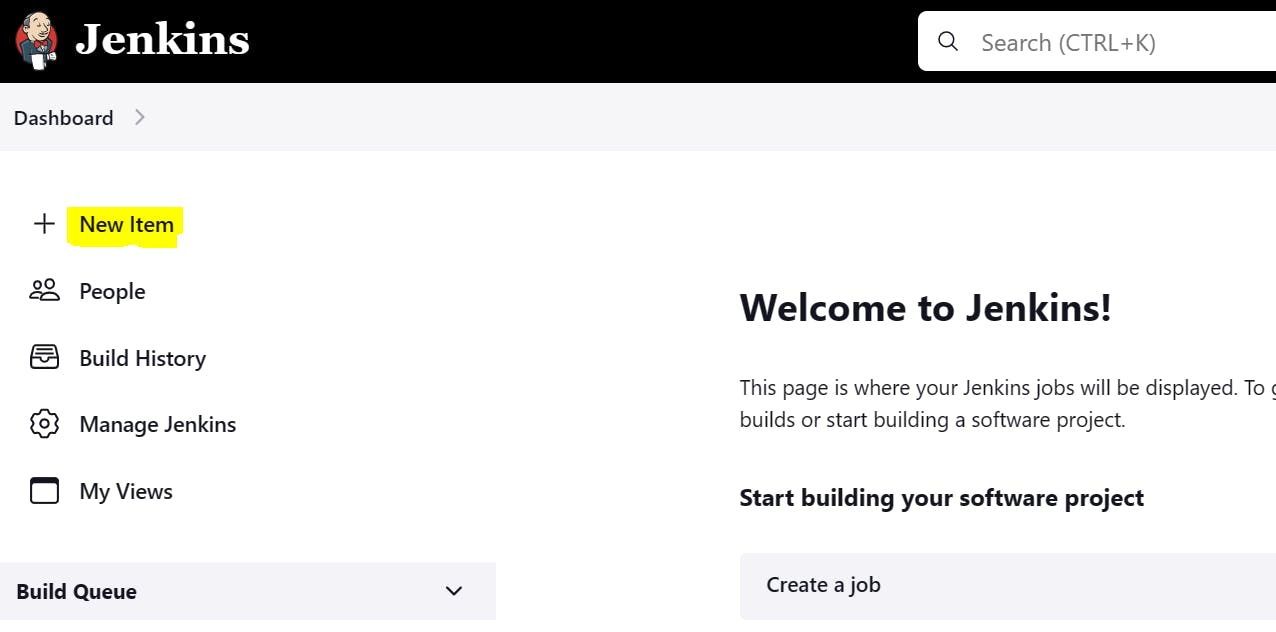
Log in to Jenkins and open the Dashboard
Create a “New Item”
Select “Freestyle project” and give a name to your project.
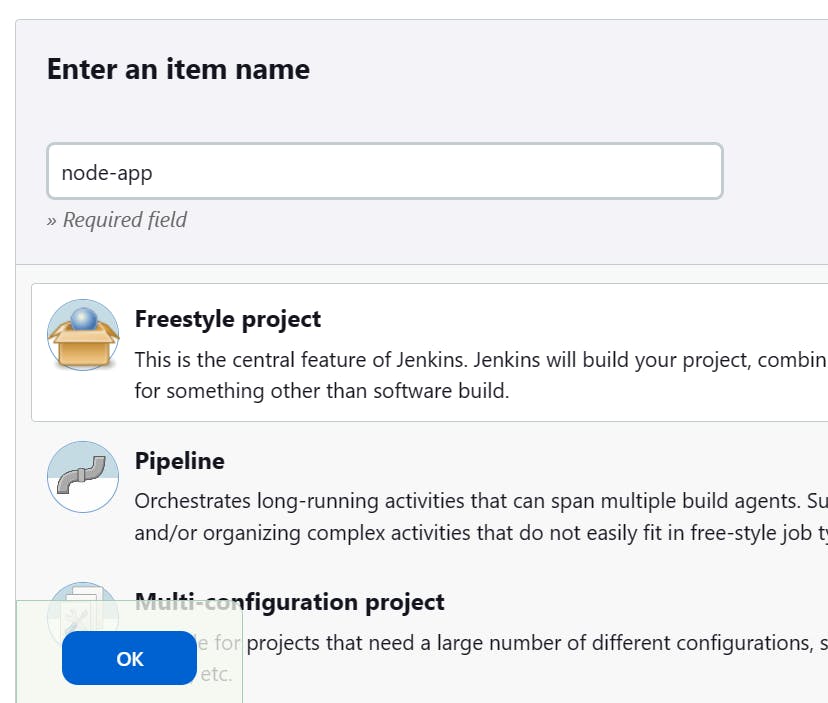
Click on the “OK” button to create the project.
In the project configuration, put the details of the project, such as the source code management system, build triggers, and build actions. In the GitHub project put your GitHub project repository URL.

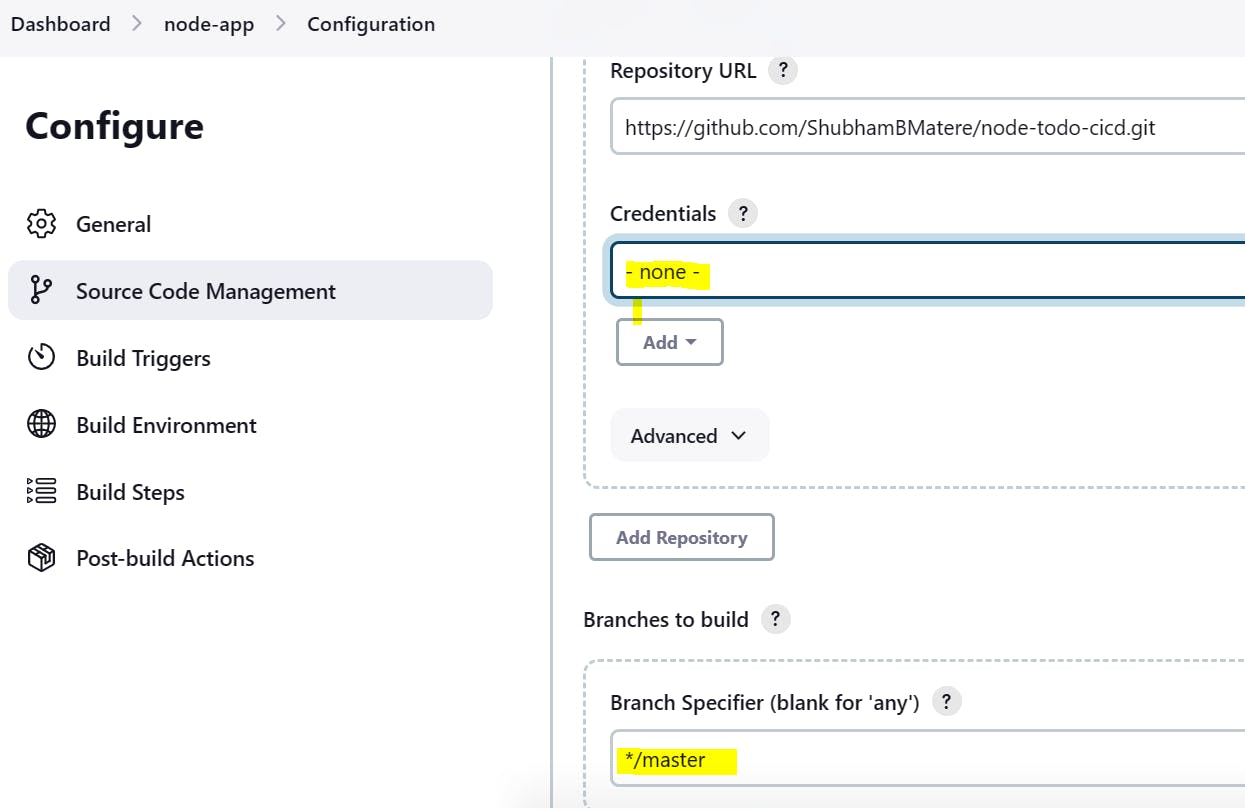
In the “Source Code Management” section, add your repository Link.
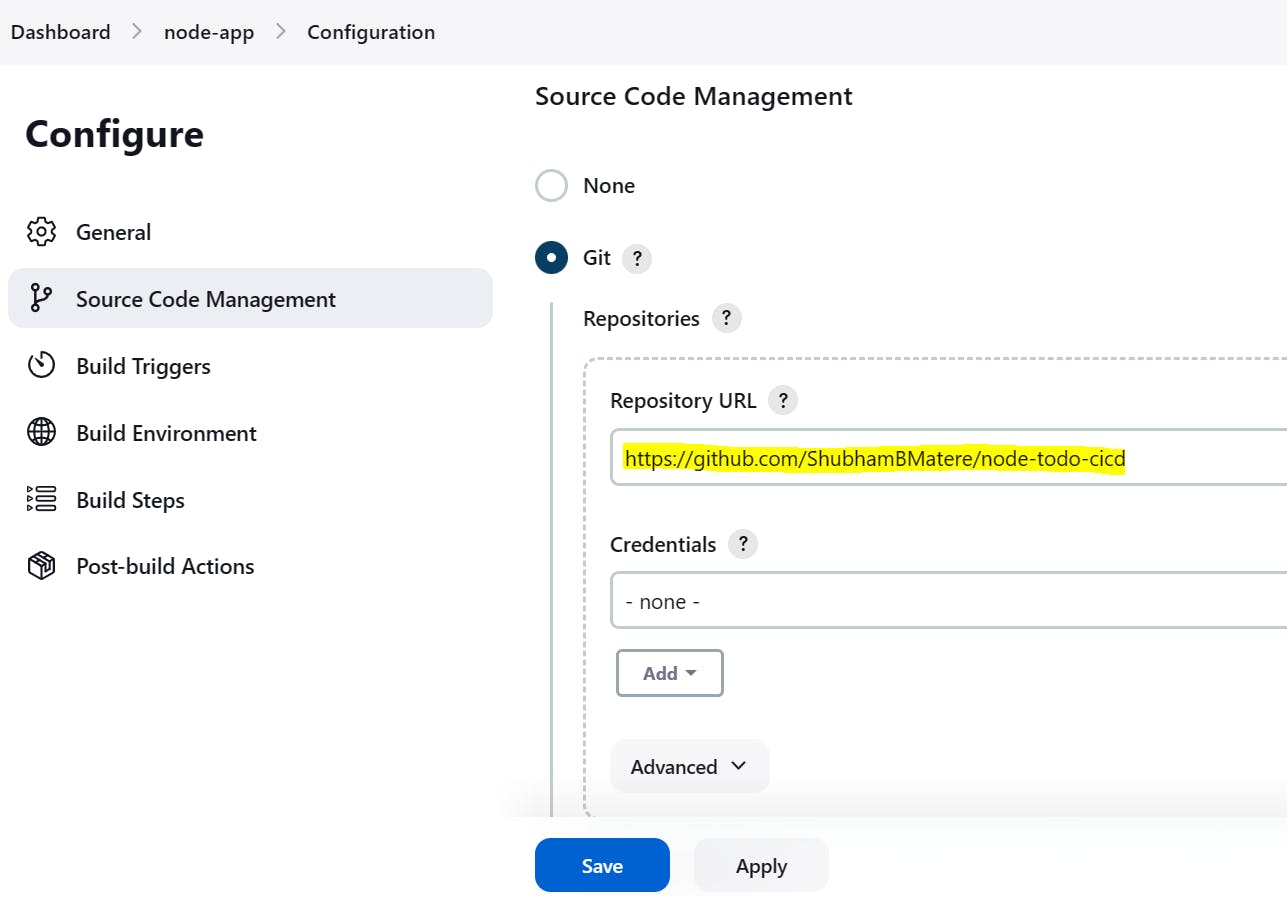
As this repository is open to the public I don't need to give credentials.
Specify the branch where the source code is present.
In the “Build” section of the project, add a build step to run the “docker build” command to build the image for the container.
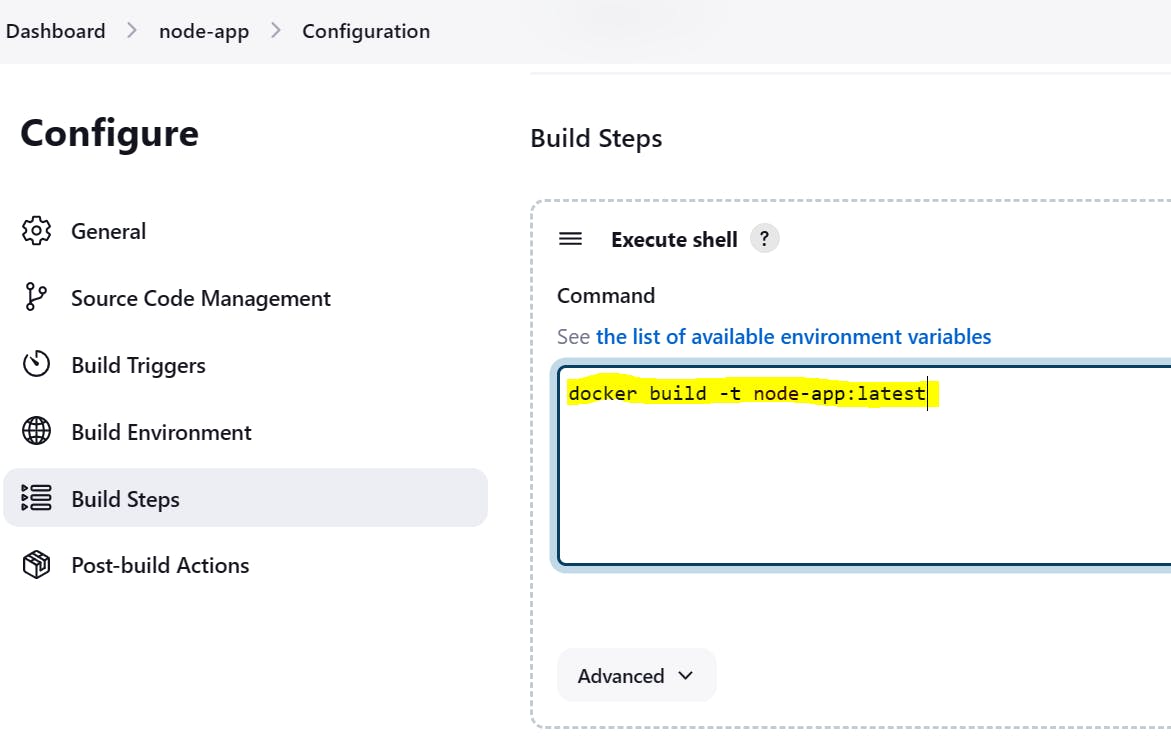
Add a second step to run the “docker run” command to start a container using the image created in the above step
Save the project configurations by clicking on the save button.
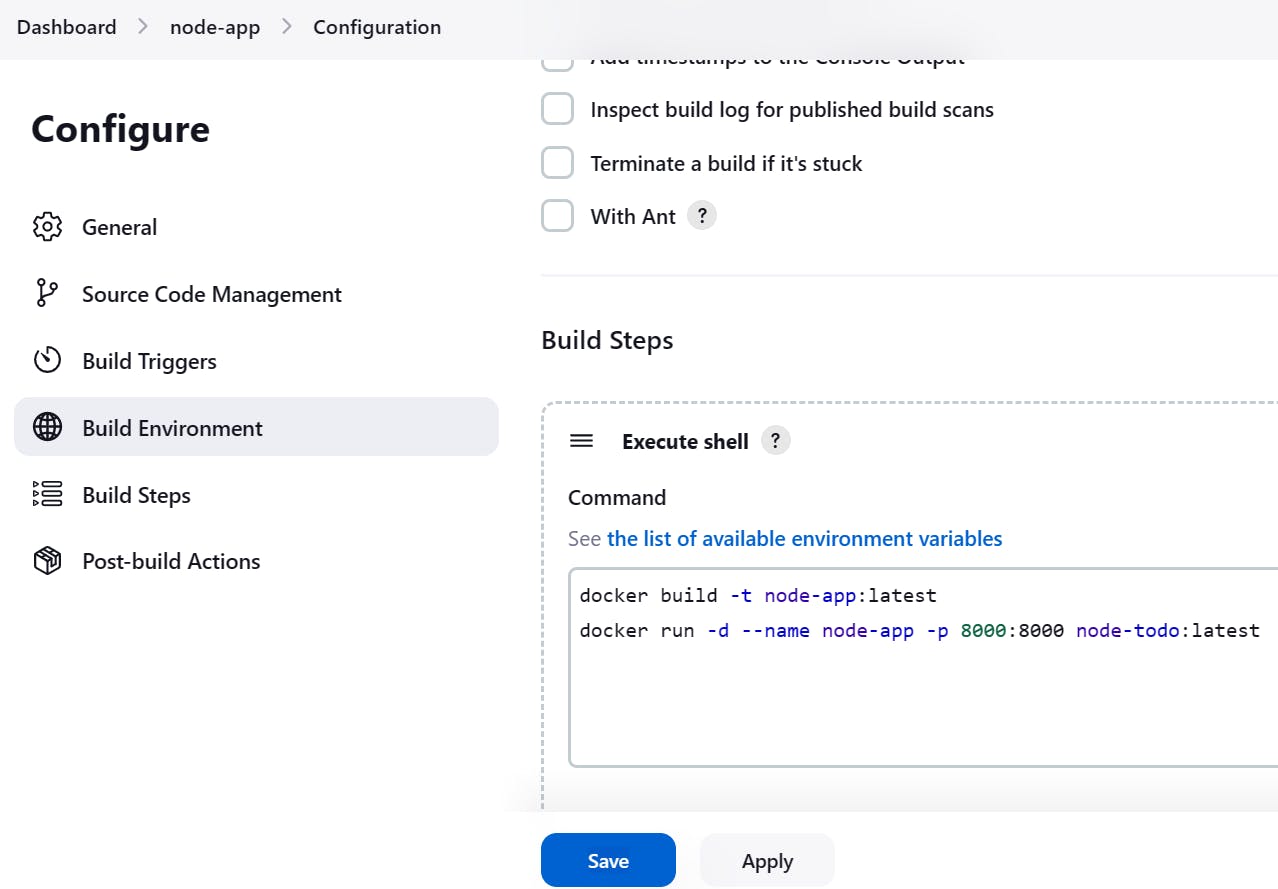
Ensure that your Jenkins agent have Docker installed. Adjust the shell commands according to your specific requirements and environment
Add a second step to run the “docker run” command to start a container using the image created.

- Check whether docker is installed or not.

- The necessary permissions to access Docker-related commands are given to Jenkins and do reboot.


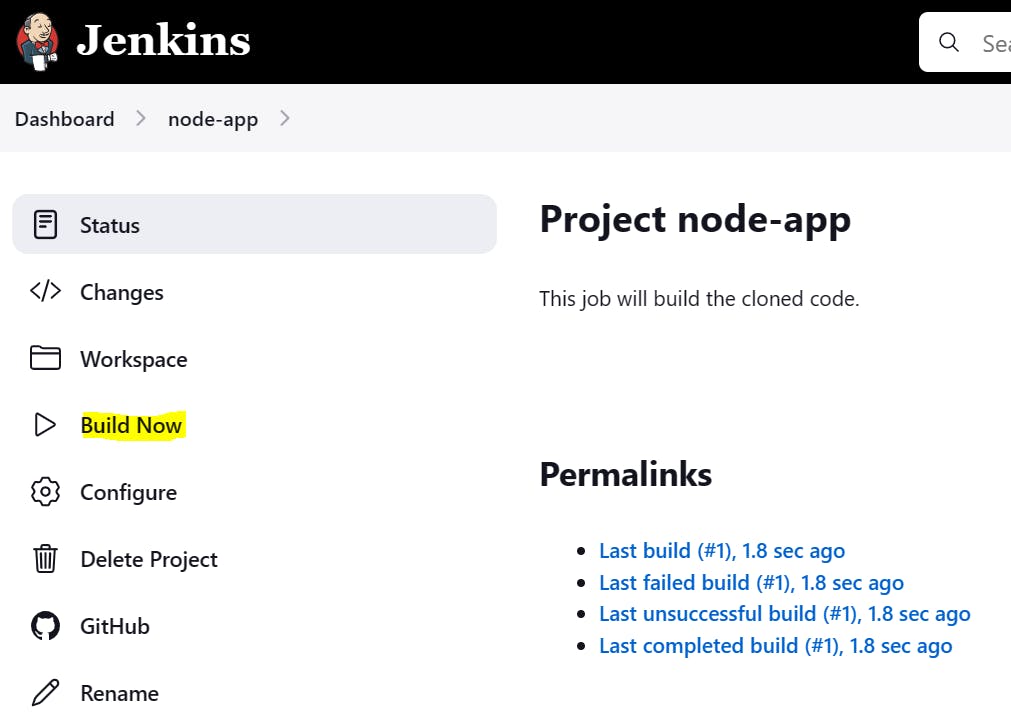
Now you can start the build process of the project by manually clicking on the “build now” tab.
This will start the build process and execute the steps specified in the project configuration (execute shell).
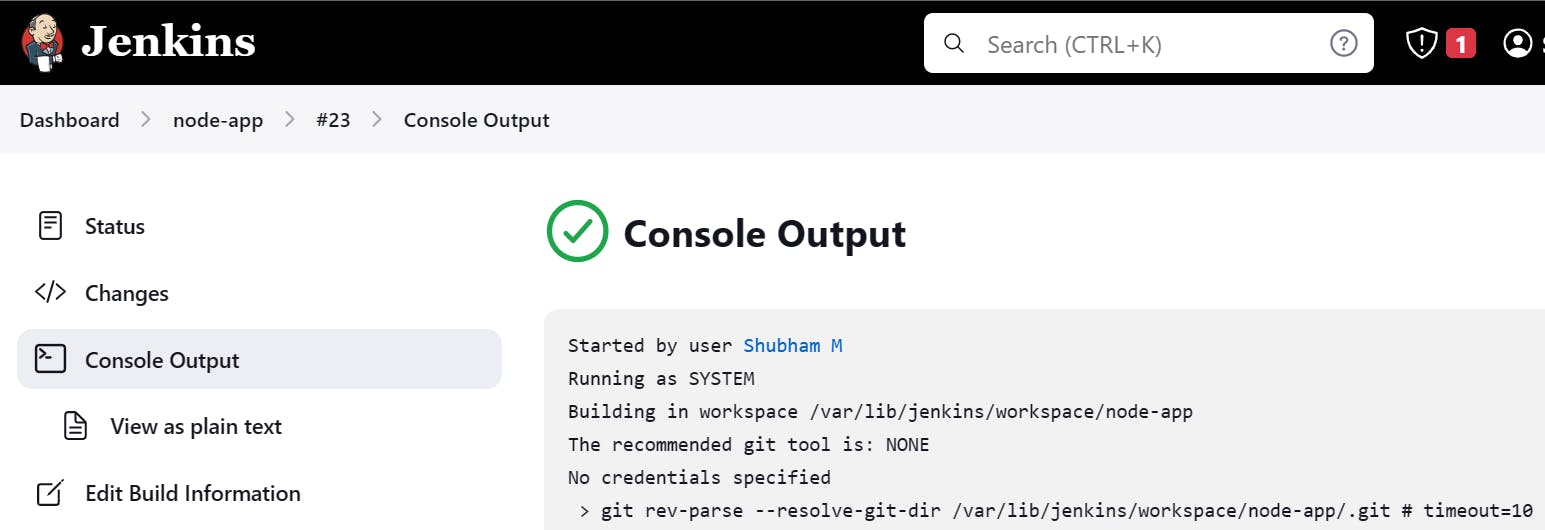
Once the build is successful, you can go to the console output and check the output of the build.

You can also go to the EC2 instance and check that the source code is been cloned on the VM and you can check the same by going to this location: /var/lib/jenkins/workspace

Also, you can see the image has been created and a container has been launched using the image that has been built, using the commands in the execute shell.
Now, for instance, the security group, the port on which your application is running, make it open so that we can access it
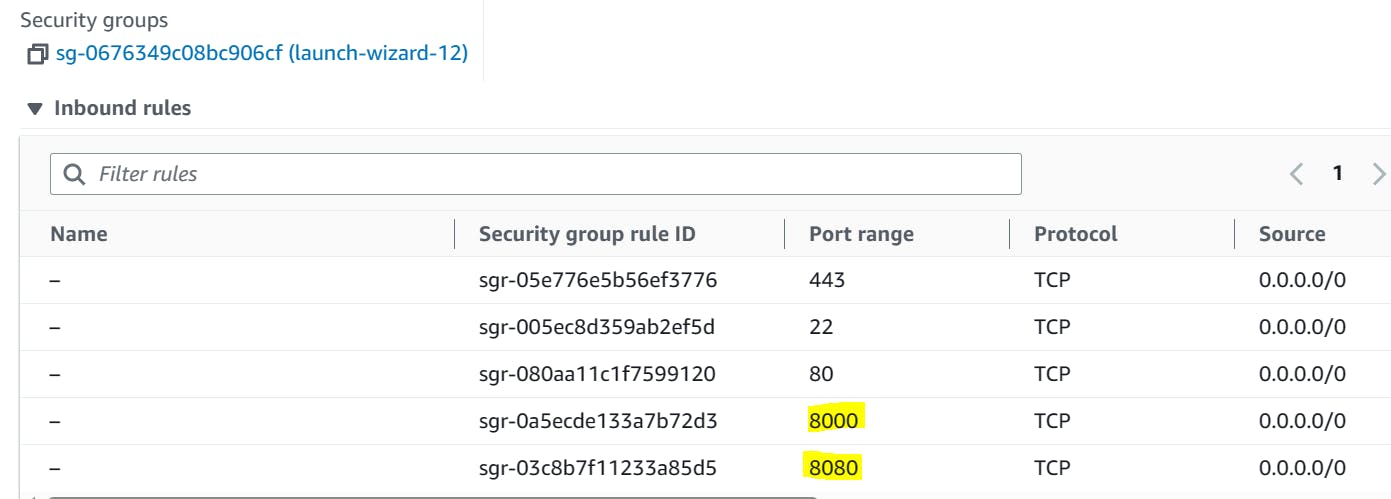
Try accessing the application using the public IP and the 8000 port on the browser.

Task-02
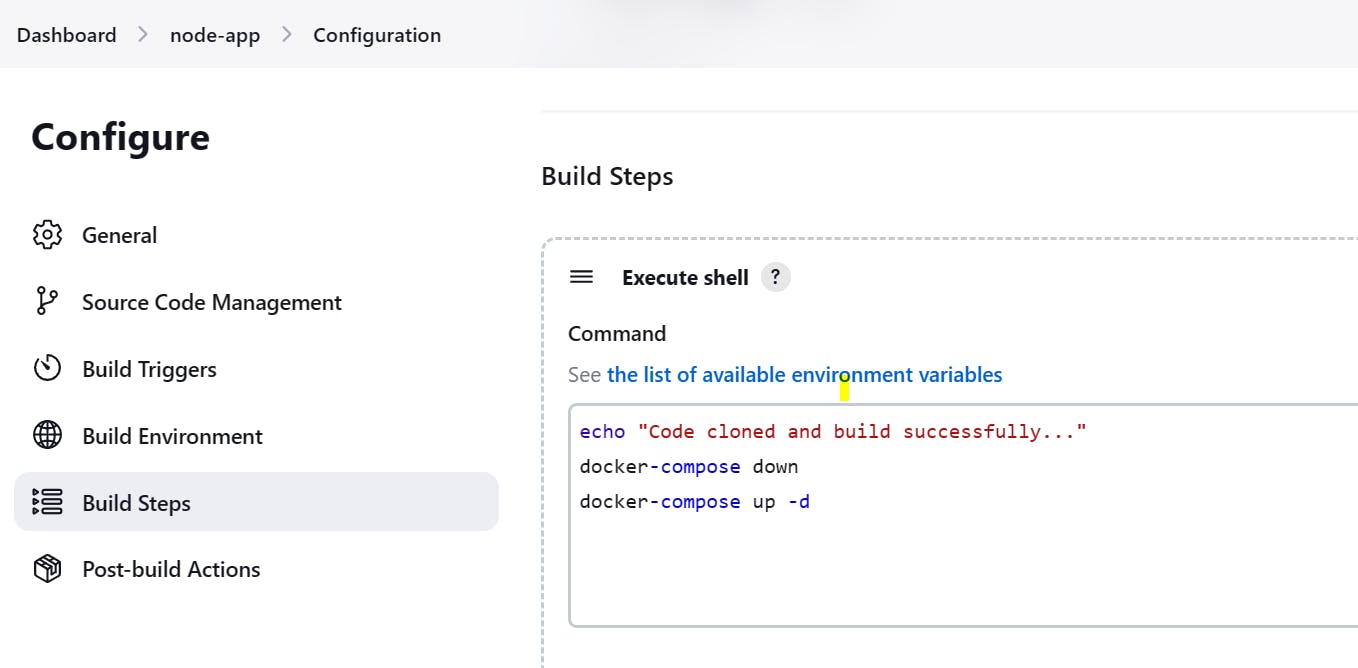
Create a Jenkins project to run “docker-compose up -d” command to start the multiple containers defined in the compose file.
Create a docker-compose.yml file inside your project folder.

In the “Build” section of the project, add a build step “docker-compose down” command to stop and remove the containers defined in the compose file, then add “docker-compose up -d” command.
Set up a cleanup step in the Jenkins project to run “docker-compose down” command to stop and remove the containers defined in the compose file.
Save the configurations and build the project.
You can check in the instance that the containers have been created.

In this way, we have completed the tasks of day 23. It is a great learning experience with these DevOps tools and I am sure I am going to deep dive into it, so stay tuned to blogs, I am sure more awesome posts on the way.
below, please feel free to connect.
https://www.linkedin.com/in/shubhambmatere/
Thank you for reading.......................................