Create IAM user using AWS CLI-Programmatic access
DevOps Engineer with 3+ years of industrial experience | DevOps Enthusiastic | Working on projects with Linux, Jenkins, Docker, Ansible, Terraform, AWS S3, Lambda, EC2, DynamoDB | Java/J2EE Developer etc.
In the previous blog, we learned about load balancers and different kinds of ELB provided by AWS. In this blog let's learn about IAM Programmatic access and AWS CLI.
In this blog topics Covered
🎯 IAM Programmatic access and AWS CLI
🎯 How to create AWS_ACCESS_KEY_ID and AWS_SECRET_ACCESS_KEY from AWS Console
🎯 How to setup and install AWS CLI and configure your account credentials
🎯 Create an IAM user using AWS CLI-Programmatic access.
✅IAM Programmatic access
IAM programmatic access refers to enabling access to AWS services and resources through APIs and command-line tools using access keys.
When you enable programmatic access for an IAM user, you generate access keys (access key ID and secret access key) that can be used to authenticate and authorize API requests.
Here's how you can enable IAM programmatic access and obtain access keys:
Open the IAM console: Sign in to the AWS Management Console, open the IAM service, and navigate to the "Users" section.
Create a new IAM user or select an existing user: Click on "Add user" or choose an existing user from the list.
Set the access type: In the "Set permissions" step, select the desired permissions for the user. You can choose to assign policies directly or add the user to IAM groups with preconfigured policies.
Configure the user details: Provide a user name and select the "Programmatic access" checkbox to enable programmatic access for the user.
Set permissions boundaries and tags (optional): You can set additional permissions boundaries or add tags to the user if required.
Review and create the user: Review the user details and click on "Create user" to create the IAM user.
Access key creation: After creating the user, you will be presented with the option to download the access keys. Click on "Download .csv" to obtain a CSV file containing the access key ID and secret access key. Make sure to securely store this file, as the secret access key will not be accessible again.
✅AWS CLI
The AWS Command Line Interface (AWS CLI) is a unified tool to manage your AWS services. With just one tool to download and configure, you can control multiple AWS services from the command line and automate them through scripts.
Here's the link to the documentation of the latest version of AWS CLI.
To use the AWS CLI:
You need to have it installed on your local machine.
Once the AWS CLI is installed, you need to configure it with your AWS credentials.
The configuration will be stored in a file named
~/.aws/credentialson Linux and macOS or%USERPROFILE%\.aws\credentialson Windows.
Some common AWS CLI commands used are aws s3 <cmd>, aws ec2 <cmd>, aws rds <cmd>, and aws iam <cmd>.
Here's the link to AWS CLI Command Reference.
✅Task 1:
Create AWS_ACCESS_KEY_ID and AWS_SECRET_ACCESS_KEY from AWS Console.
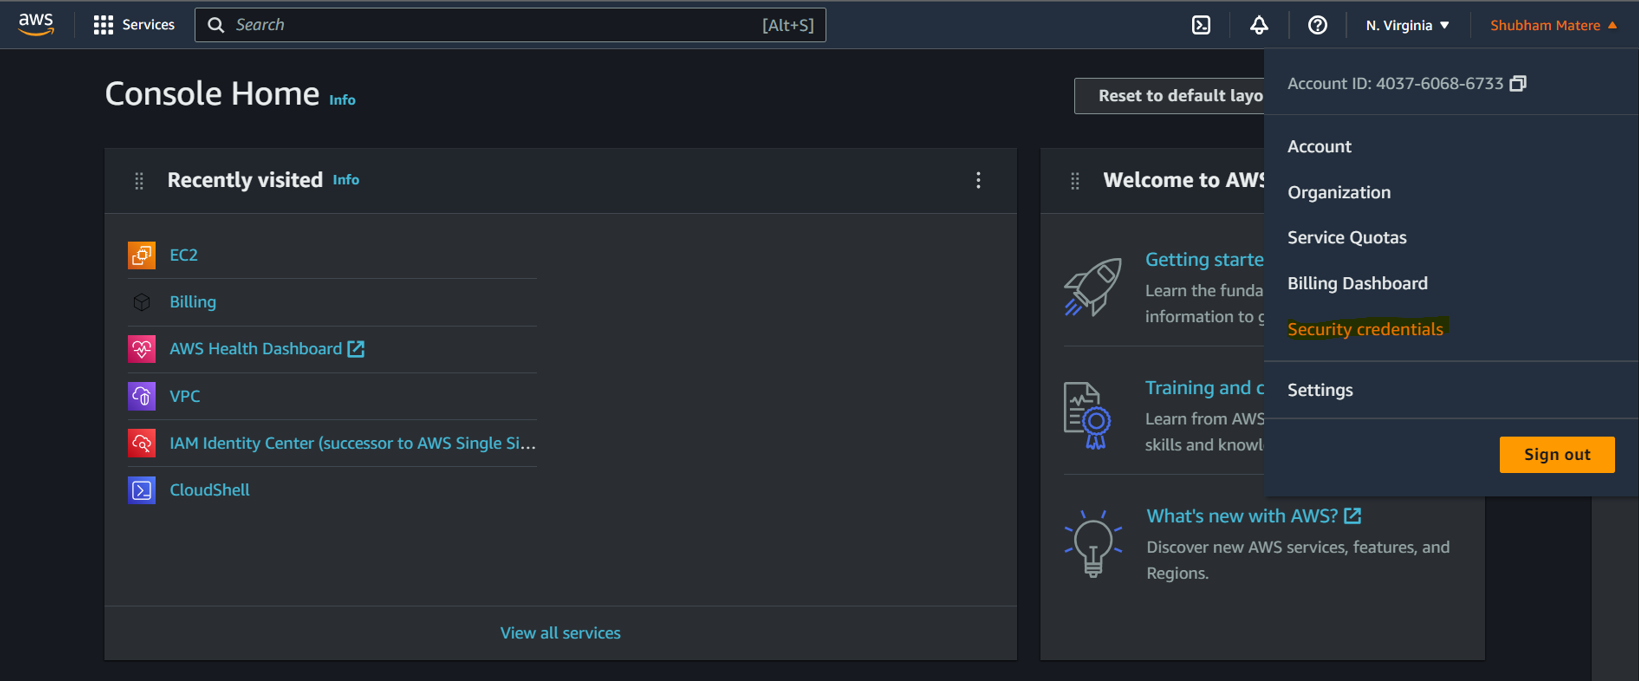
On the right top corner, Click on your profile name > Select Security Credentials.
Scroll down to Access Keys > Select Create Access Key.
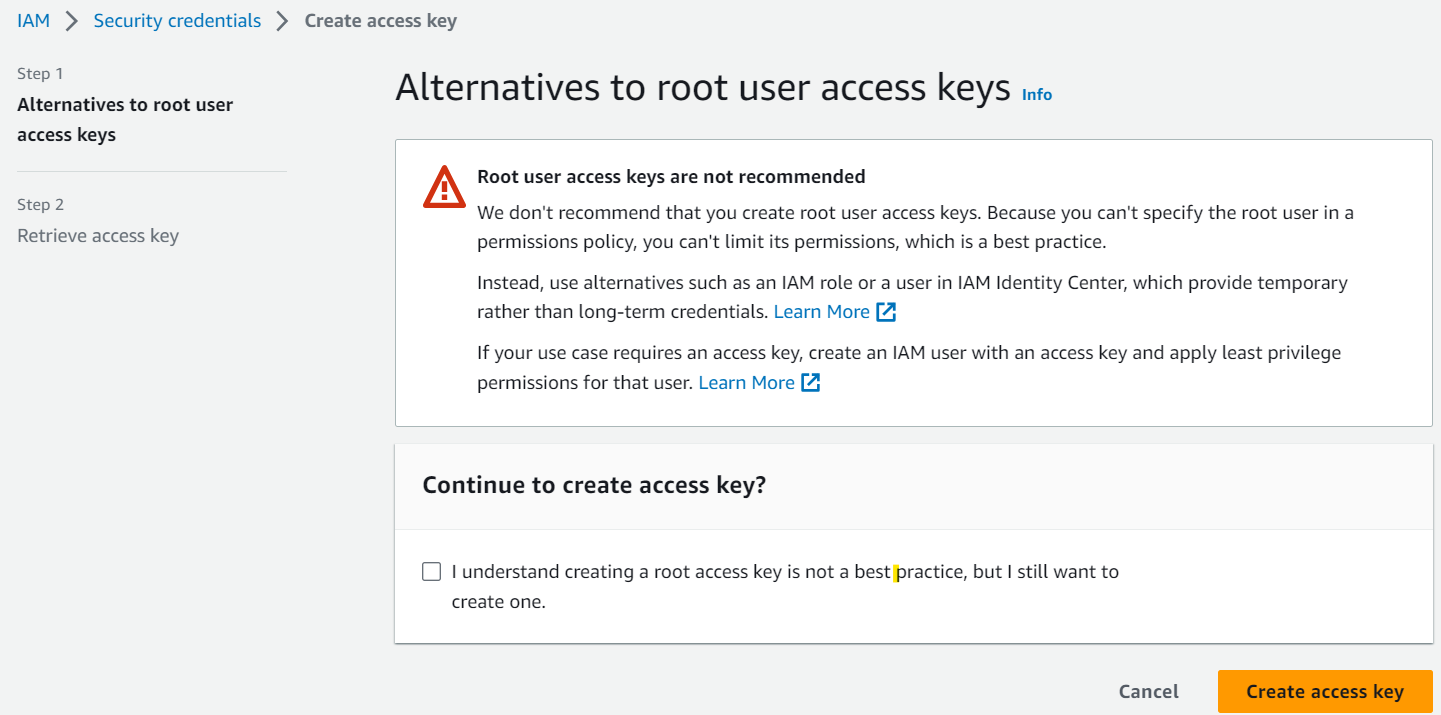
Click on the I understand checkbox > Create Access Key.
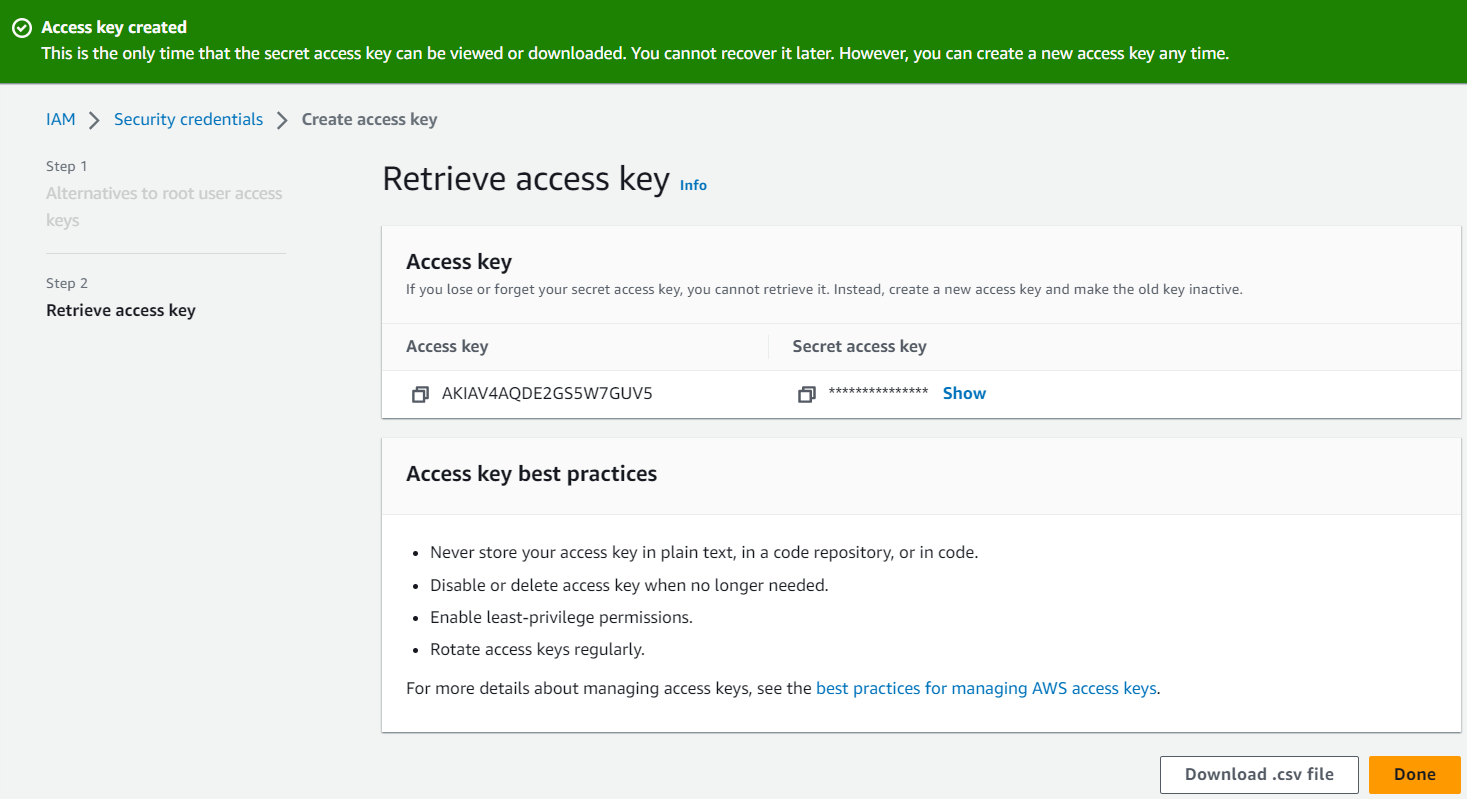
Make sure you download the access key file and store it securely with you.
✅Task 2:
Set up and install AWS CLI and configure your account credentials.
Install AWS CLI in your Linux machine (I am using Ubuntu) using the following steps:
sudo apt-get update
sudo apt install unzip
curl "https://awscli.amazonaws.com/awscli-exe-linux-x86_64.zip" -o "awscliv2.zip"
unzip awscliv2.zip
sudo ./aws/install

To check the version & installation, try running the commands:
aws --version

Configure your account credentials by using:
aws configure
Pass the Access Key ID, Secret Access Key, and Region Name as you want, and the output format you need (JSON or text) through the terminal.

To list all EC2 instances:

✅Task 3:
Create IAM user using CLI - Programmatic access
We have created an IAM user using the UI in the above tasks and now we are going to use that user to create a new user. So let's start.
So I will go to the command prompt and then type AWS configure if you haven't configured the CLI. Also, you will have to provide the access key ID and the access key and then you will be connected.
I will follow the flow as first I will create the group then I will attach that that group to the policy and then I will create a new user then I will create the access key for that user and then I will add that user to the group and then this user will have the permission and then I will connect again so I will run AWS configure again but this time I will connect with the new user.
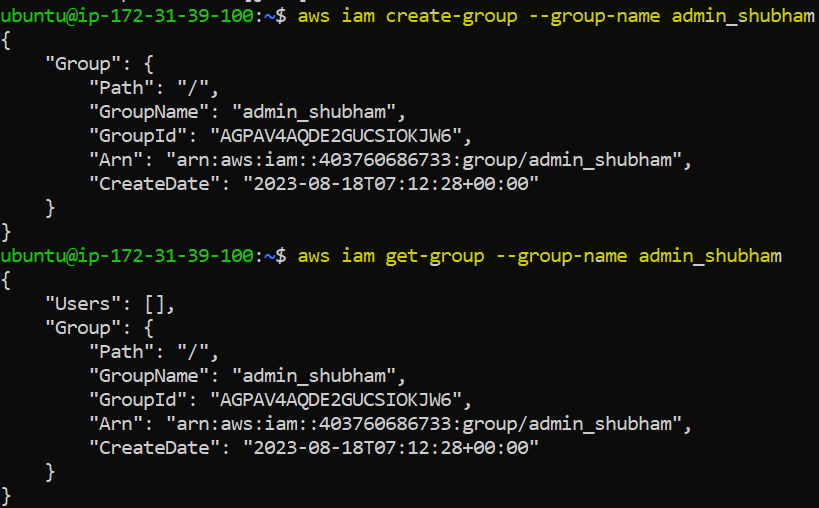
aws iam create-group --group-name admin_shubham
aws iam get-group --group-name admin_shubham
In the first command, you will have to provide the group name.
In the above commands, admin_shubham is the group name just created.
If you want to get a particular attribute name, type the following command where after --query and add Group.GroupId/Path etc attributes to it.
aws iam get-group --group-name admin_shubham --query Group.GroupId
aws iam get-group --group-name admin_shubham --query Group.GroupId --output text

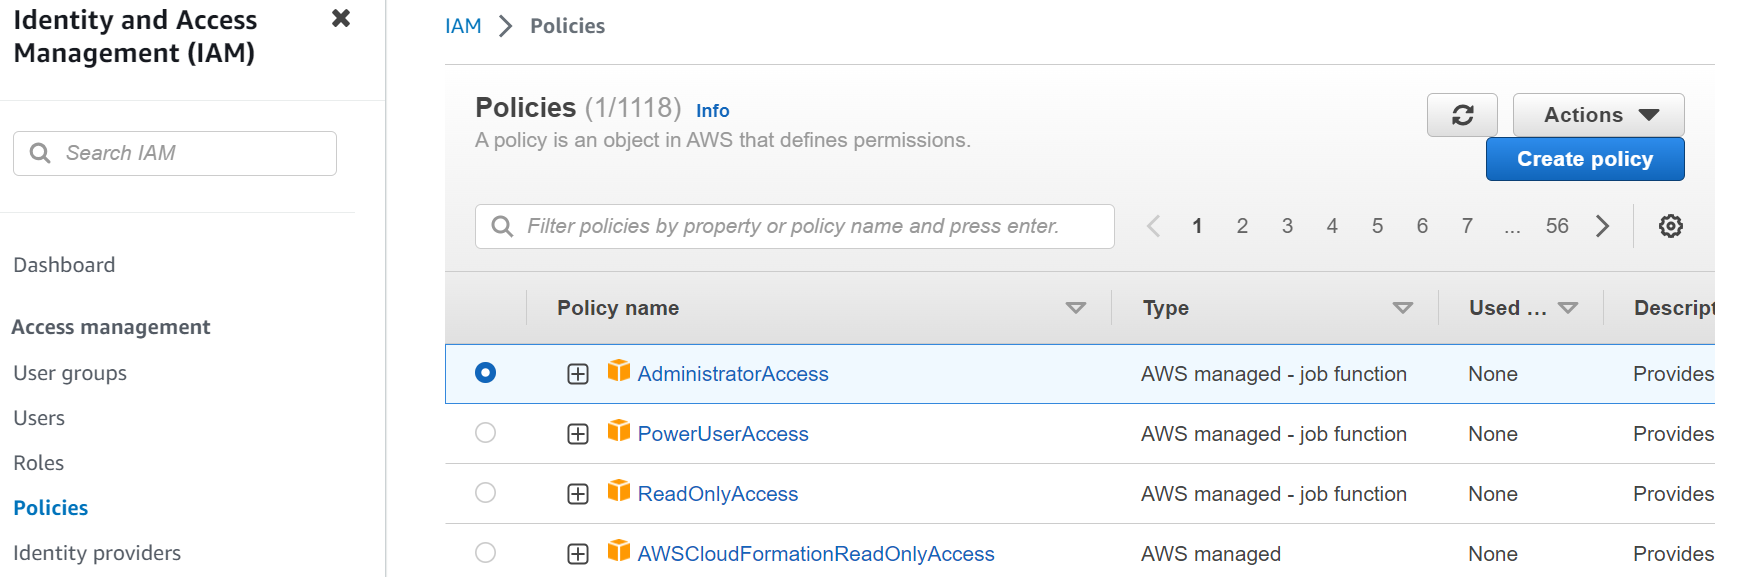
Now, we will attach Group Policy where you will have to provide the group name and the policy Arn. To get the Policy ARN follow the following steps.
To get the Policy ARN, go to the IAM management console, click on policies and you will get the list of all policies available. In this case, I am using the AdministratorAccess policy.
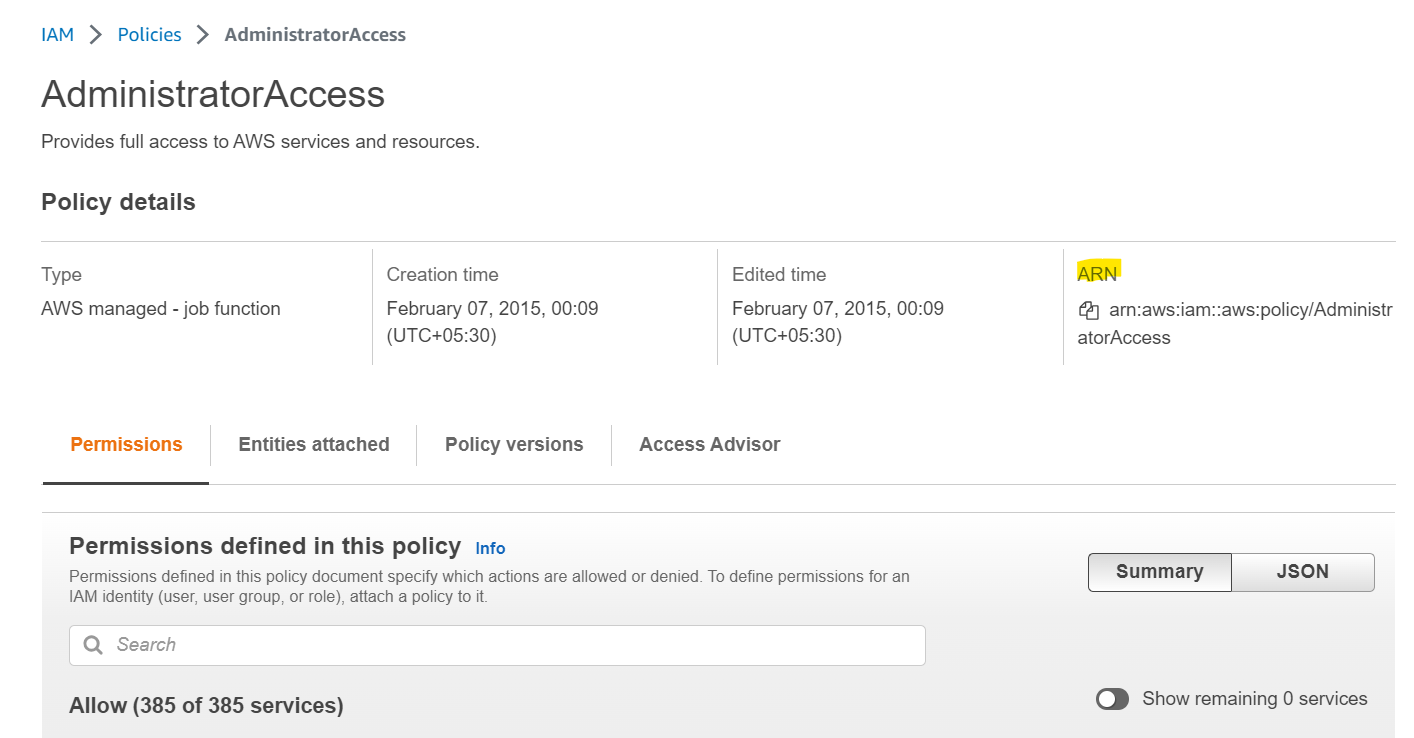
So, I will click on AdministratorAccess as listed above and I will get the following page where ARN is available to copy.
Now, we will create a user with the username administrator.
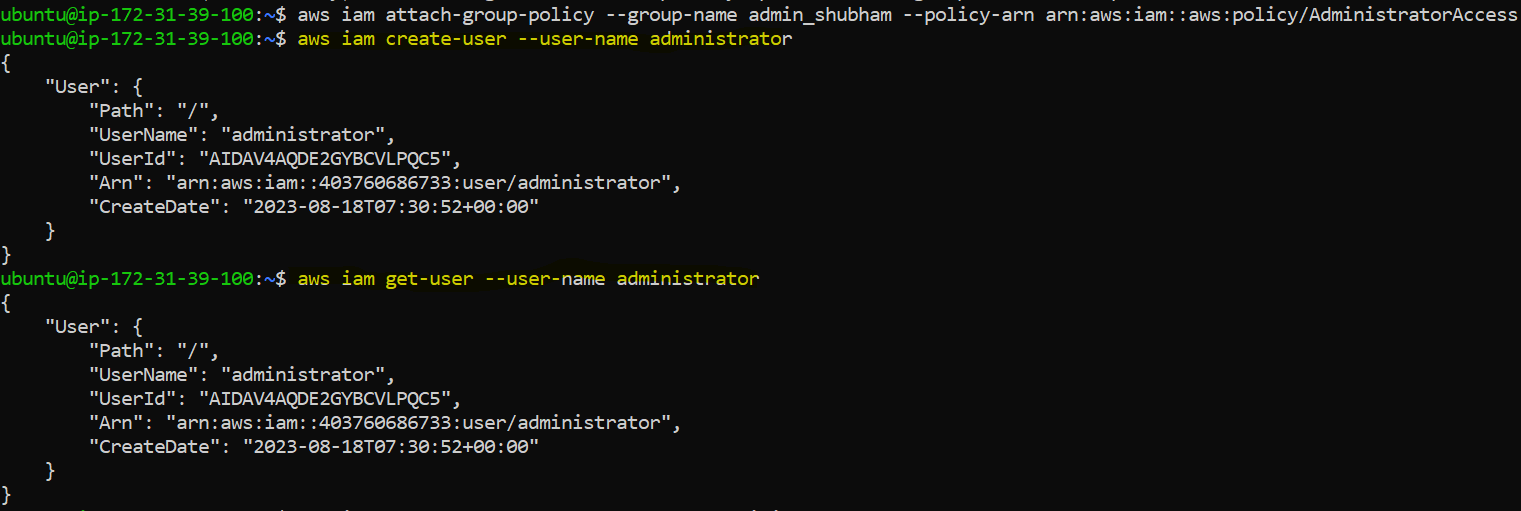
aws iam attach-group-policy --group-name admin_shubham --policy-arn arn:aws:iam::aws:policy/AdministratorAccess
aws iam create-user --user-name administrator
aws iam get-user --user-name administrator
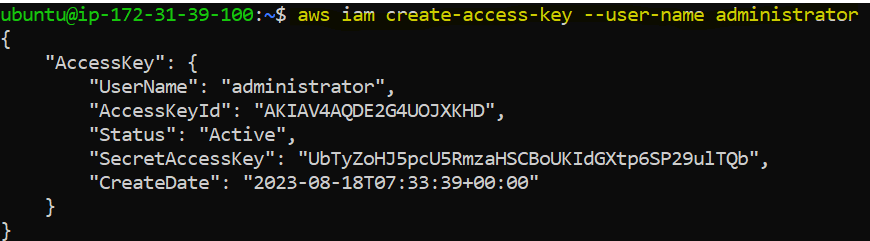
Once the user is created you will have to create the access key.
Now, you will have to attach/add this user to the group we have created in the first step i.e. admin_shubham.

Now, we have to configure the user as we have done in Task 2 above. Here you will be asked for the access key ID and Secret access key which we created above.
aws iam create-access-key --user-name administrator
aws iam add-user-to-group --group-name admin_shubham --user-name administrator
aws configure
aws iam get-group --group-name admin_shubham
Now, if you want to check whether the user is added successfully to our group or not, you can use the following command.
As we can see user administrator is successfully added to the group admin_shubham.

aws iam get-group --group-name admin_shubham
aws iam get-group --group-name admin_shubham --query Group.[GroupId,GroupName,CreateDate]
aws iam get-group --group-name admin_shubham --query Group.[GroupId,GroupName,CreateDate] --output text
Furthermore, if you want to get particular information about a group or user you can use the following command. Also, you can change the output format from JSON to text in the following way.

There are many more CLI commands which will have the filter parameter also where you can use that particular parameter to filter out the output. Right now we are just filtering out the values that you need.
But what if you want to filter more information, suppose you are fetching the S3 bucket list and you are interested in some particular bucket.
You know and you want to filter out based on a few properties how exactly you can do this so these things also will be covered in the upcoming blogs.
In this blog, I have discussed IAM Programmatic Access and AWS CLI. If you have any questions or would like to share your experiences, please leave a comment below. Don't forget to read my blogs and connect with me on LinkedIn and let's have a conversation.
In the next blog post, we will start deploying the network. So first thing will be VPC so we will deploy the VPC and there we will learn more parameters. So, stay tuned and let me know if there is any correction.
please feel free to connect.
Git Hub Repo: https://github.com/ShubhamBMatere/90DaysOfDevOps/blob/master/2023/day42/tasks.md
Thank you for reading!