

Step-by-Step Guide to Building a multi-branch, multi-Agent, multi-Stage Jenkins Pipeline


Table of contents

No headings in the article.
Hello learners,
This is my 26 & 27th Day of #90DaysOfDevops initiated by Shubham Londhe. Bare with me for the article and I am sure you will gain some knowledge about Jenkins Pipeline.
Introduction:
The main fundamentals behind a multi-branch pipeline in Jenkins are as follows:
Branches as First-Class Citizens: In a multi-branch pipeline, branches are treated as first-class citizens. Each branch in your version control repository (e.g., Git) can have its own pipeline configuration and set of stages.
Automatic Branch Discovery: Jenkins automatically scans your version control repository for branches and creates a pipeline job for each branch it finds. This eliminates the need to manually create a separate job for every branch.
Branch-Specific Configuration: Each branch can have its own Jenkinsfile or pipeline configuration file, allowing you to define different stages, agents, triggers, and other pipeline settings specific to that branch. This flexibility enables you to tailor the pipeline to the unique requirements of each branch.
Automatic Build and Deployment: When changes are detected in a branch, Jenkins automatically triggers the corresponding pipeline for that branch. This ensures that builds and deployments are initiated automatically, providing continuous integration and continuous delivery capabilities.
Branch Status and Visibility: Jenkins provides a comprehensive overview of all branches and their pipeline statuses. You can easily monitor the status of each branch, view the pipeline execution history, and access detailed logs and reports for each branch's pipeline runs.
Efficient Resource Utilization: Multi-branch pipelines can optimize resource utilization by allocating agents dynamically based on the branch requirements. For example, different branches may require different agents with specific configurations or tools. Jenkins assigns the appropriate agents to each branch, ensuring efficient resource allocation.
Branch-Specific Pull Request Integration: Multi-branch pipelines often integrate with pull request systems. Jenkins can automatically trigger pipeline runs for pull requests, allowing you to perform automated builds, tests, and other checks before merging the changes into the target branch.
Easy Branch Management: Multi-branch pipelines simplify branch management. As branches are created, merged, or deleted in your version control system, Jenkins automatically adjusts the corresponding pipeline jobs, ensuring that the pipeline reflects the current state of the branches.
By leveraging these fundamentals, multi-branch pipelines in Jenkins provide a powerful and automated approach to managing the CI/CD process for software projects with multiple branches.
In this step-by-step guide, we will walk you through the process of setting up a two-branch, two-agent, four-stage Jenkins pipeline. This pipeline will help you automate the build and deployment process for your software projects.
Here, we will be deploying an application through one branch allocating one agent for two stages the build stage and the test stage. For the second branch, we will allocate another agent with two stages to perform like Verifying the credentials of DockerHub and pushing the image to DockerHub*.*
Prerequisites: Before we begin, ensure that you have the following prerequisites in place:
A Jenkins server up and running. If you are not aware of, please go through these articles for basic understanding of Jenkins
Basic knowledge of Jenkins and familiarity with the Jenkins user interface.
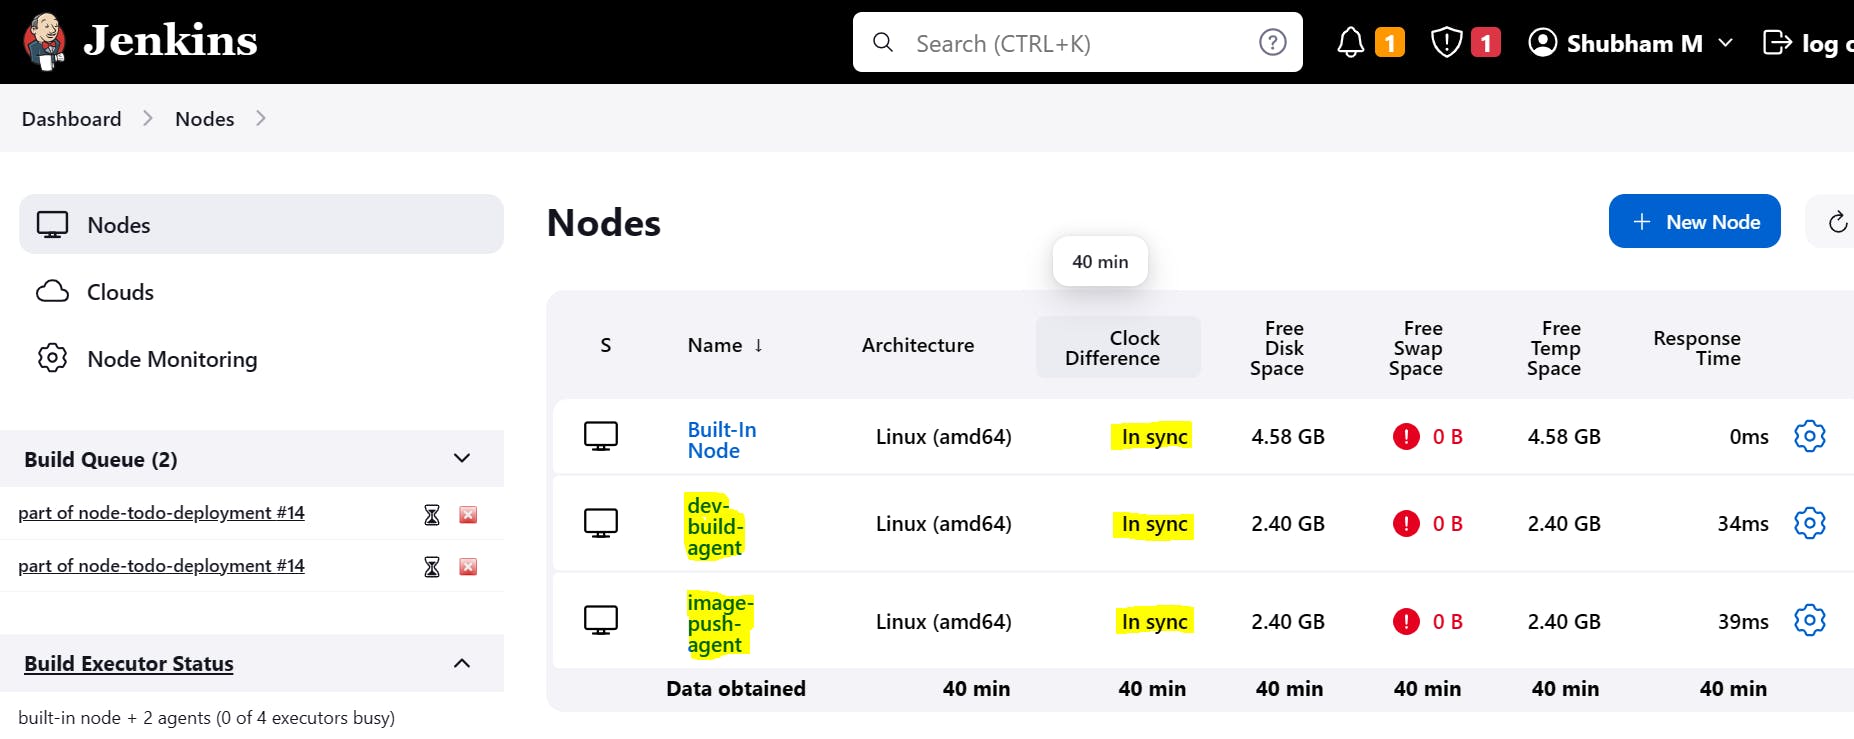
Two agents (build machines) are configured and connected/online to the Jenkins server.
Step 1: Configure Git Repository:
Create a Git repository that contains your project code. If you want to refer or fork this repository ShubhamBMatere/node-todo-cicd (github.com)
Ensure your Git repository has two branches, such as "dev" and "master," to represent the two branches in our Jenkins pipeline.
Step 2: Create Jenkins Pipeline Job:
Click on "New Item" on the Jenkins home page to create a new job.
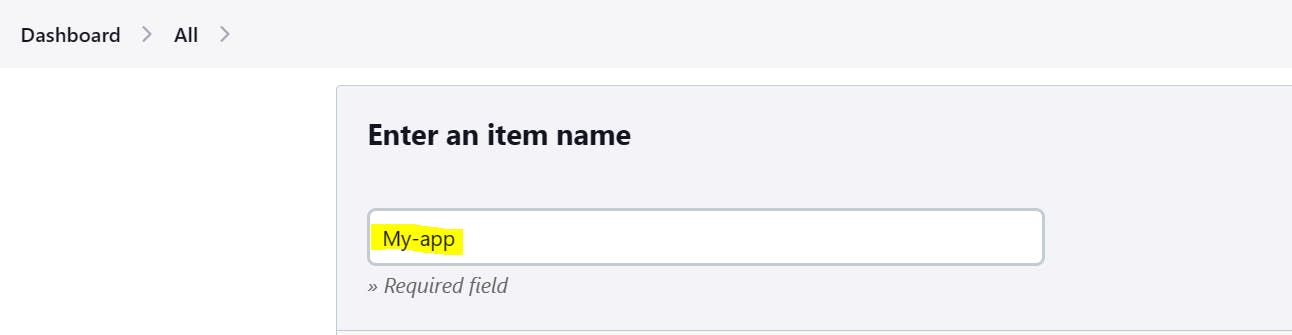
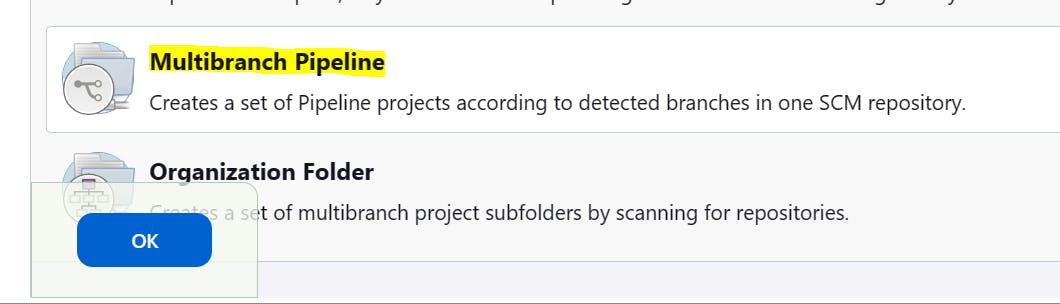
Enter a name for your pipeline job and select the "Multibranch Pipeline" type and click on OK.
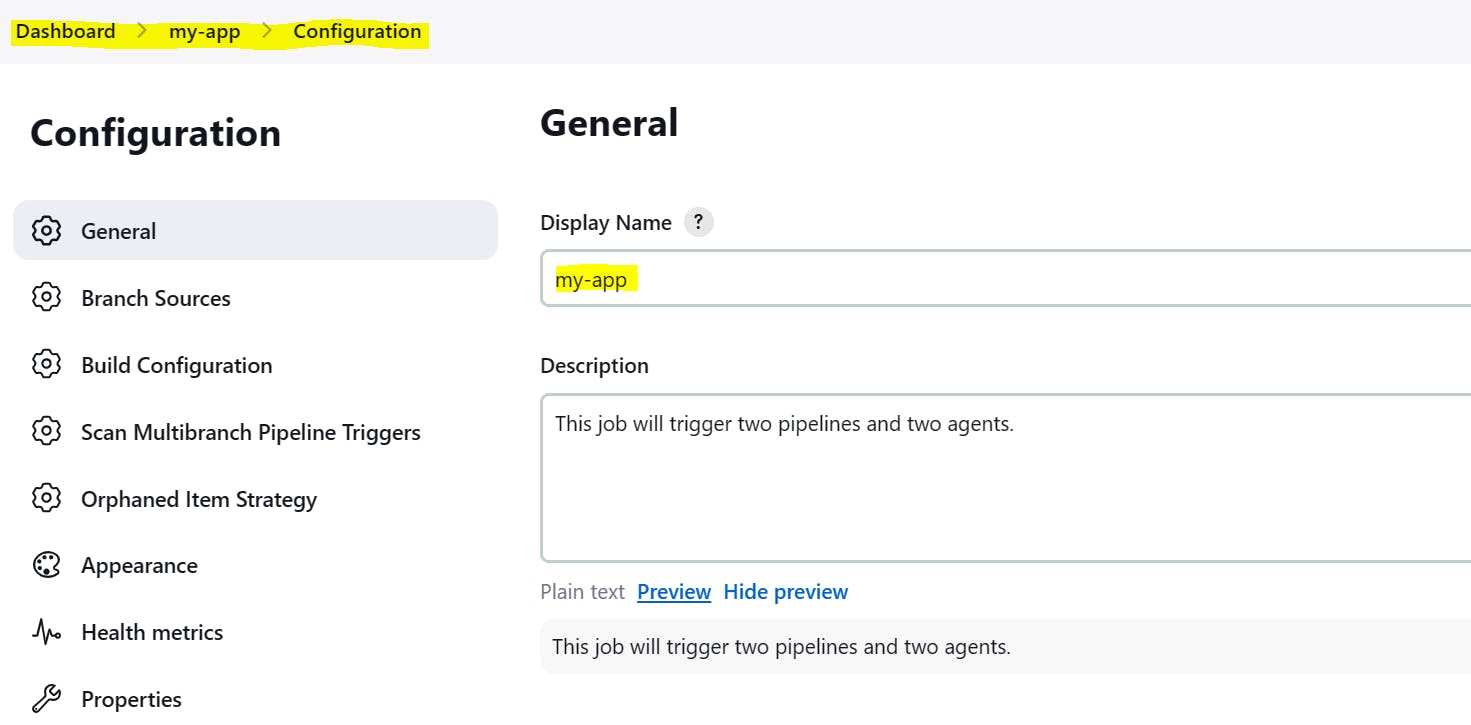
The window below will appear, enter Display Name and Description.
In the Branch Resources section, add source dropdown, I am selecting Git.

Simply put the git repository URL. As it is my public repository I don't need to put any credentials.
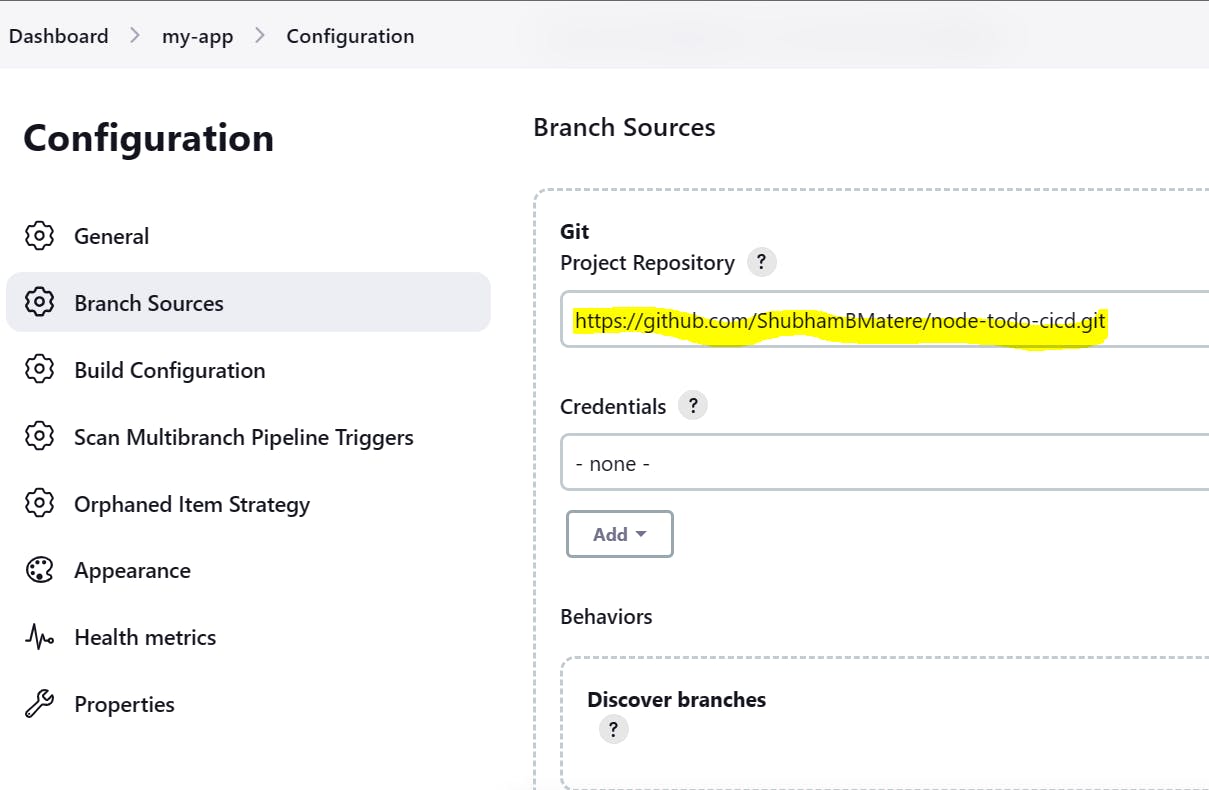
Click on "Save" to create the pipeline job.
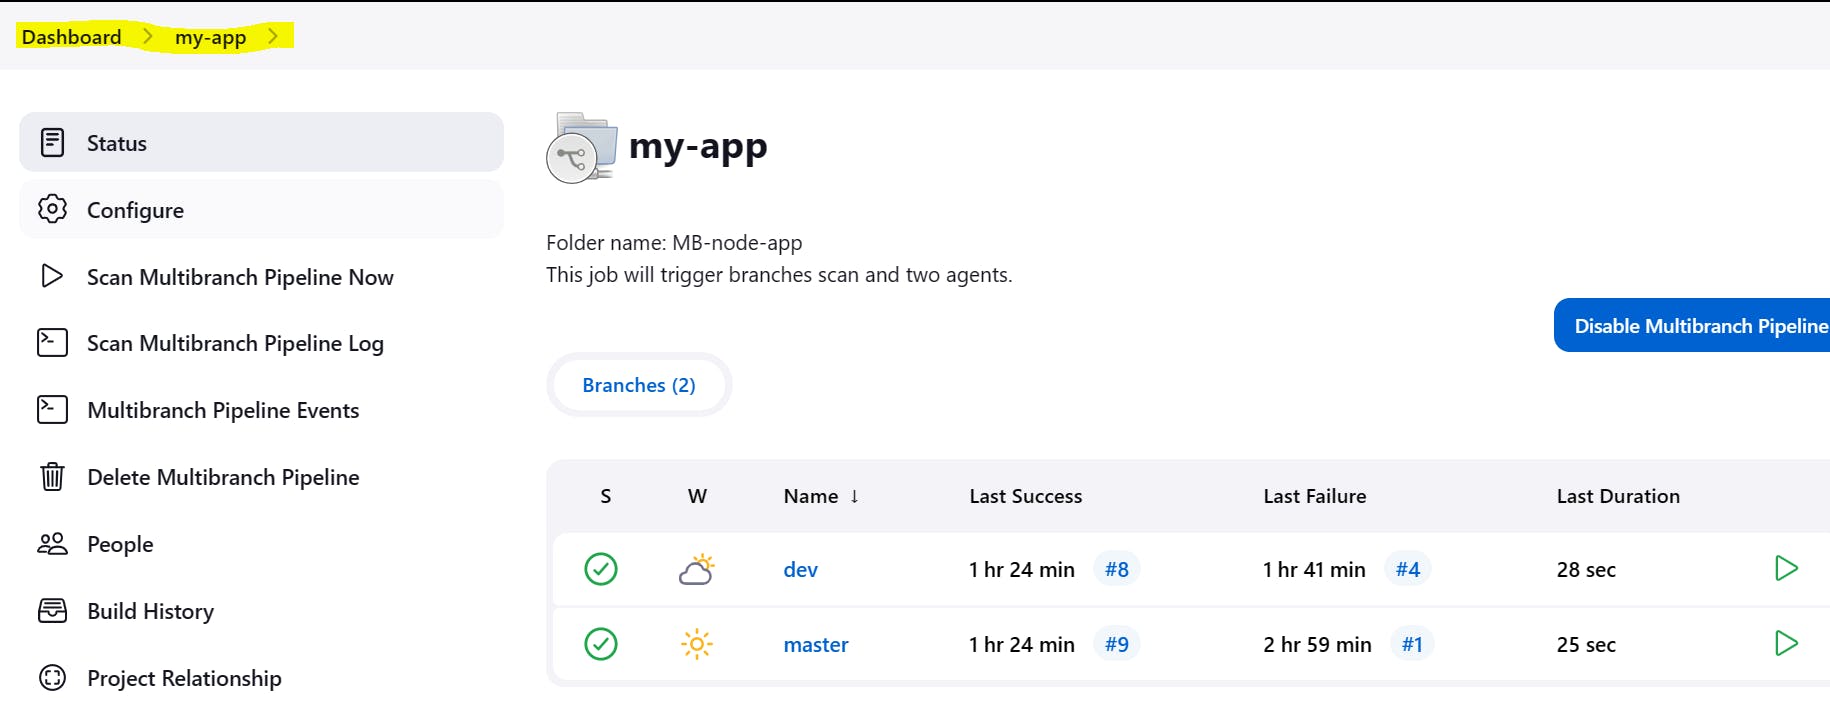
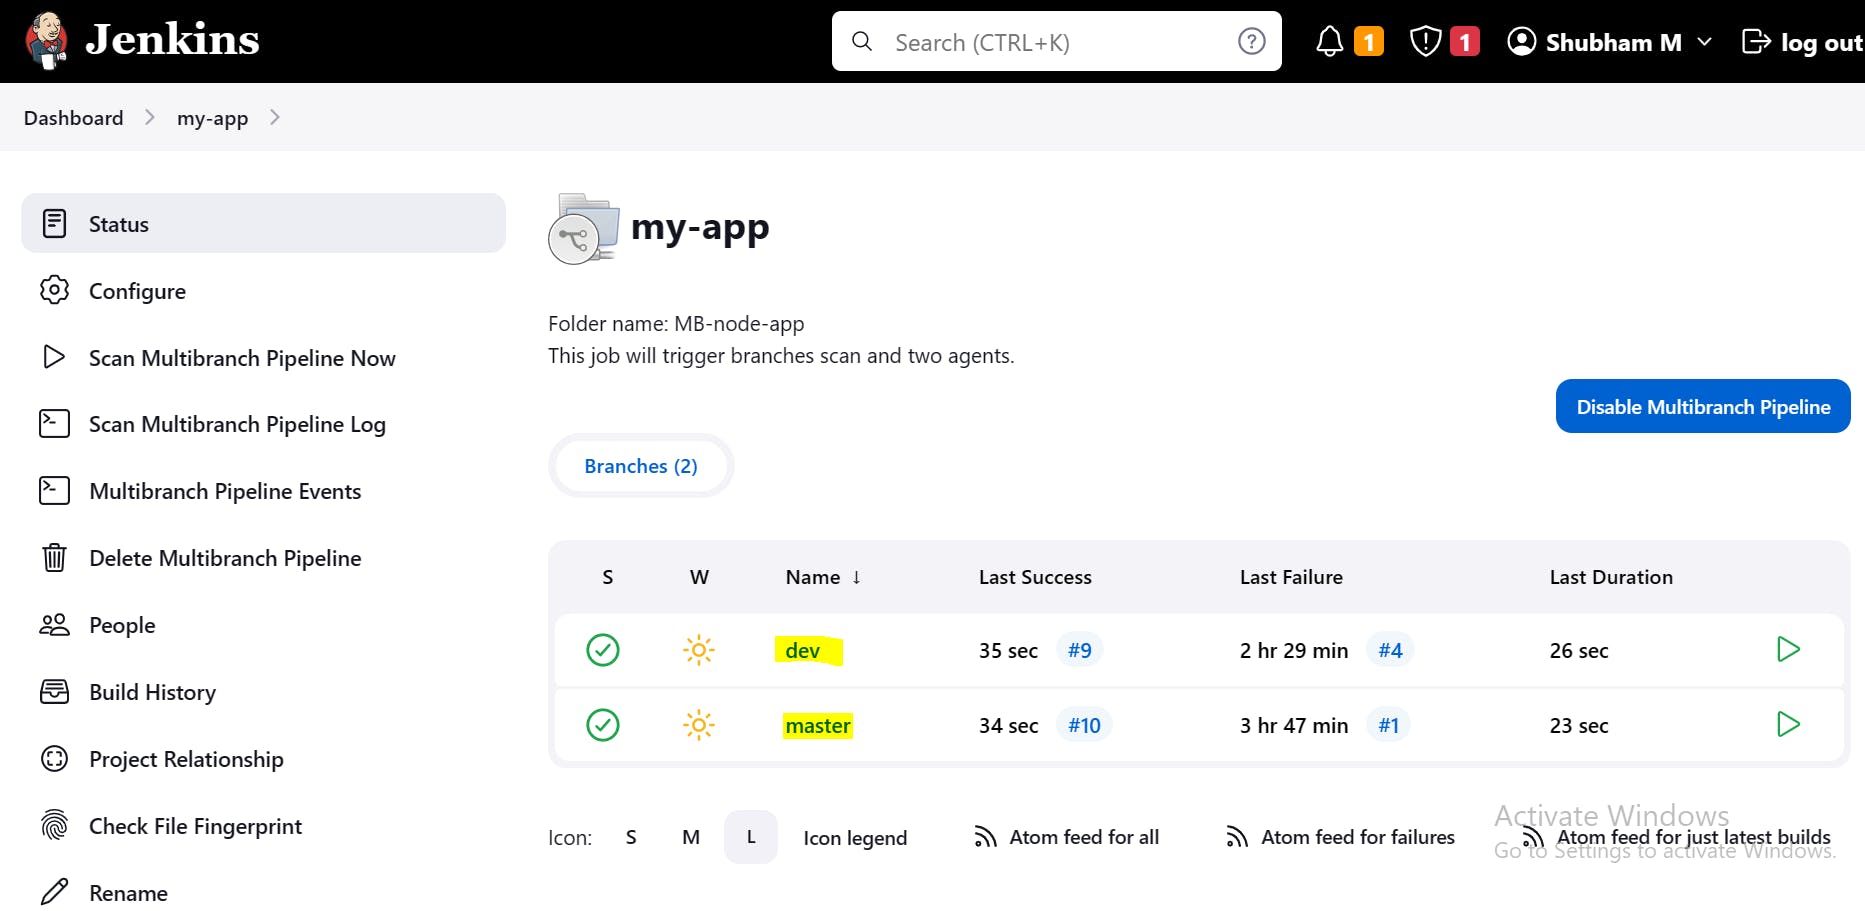
As soon as you click on save, whatever braches are their on your repository, will reflect in Dashboard --> status as follow..
Step 3: Define Jenkins Pipeline Stages:
In the pipeline job configuration, scroll down to the "Pipeline" section.
In the script area, define the stages of your pipeline using the declarative syntax. For example:
Step 4: Configure Jenkins Environment Variables:
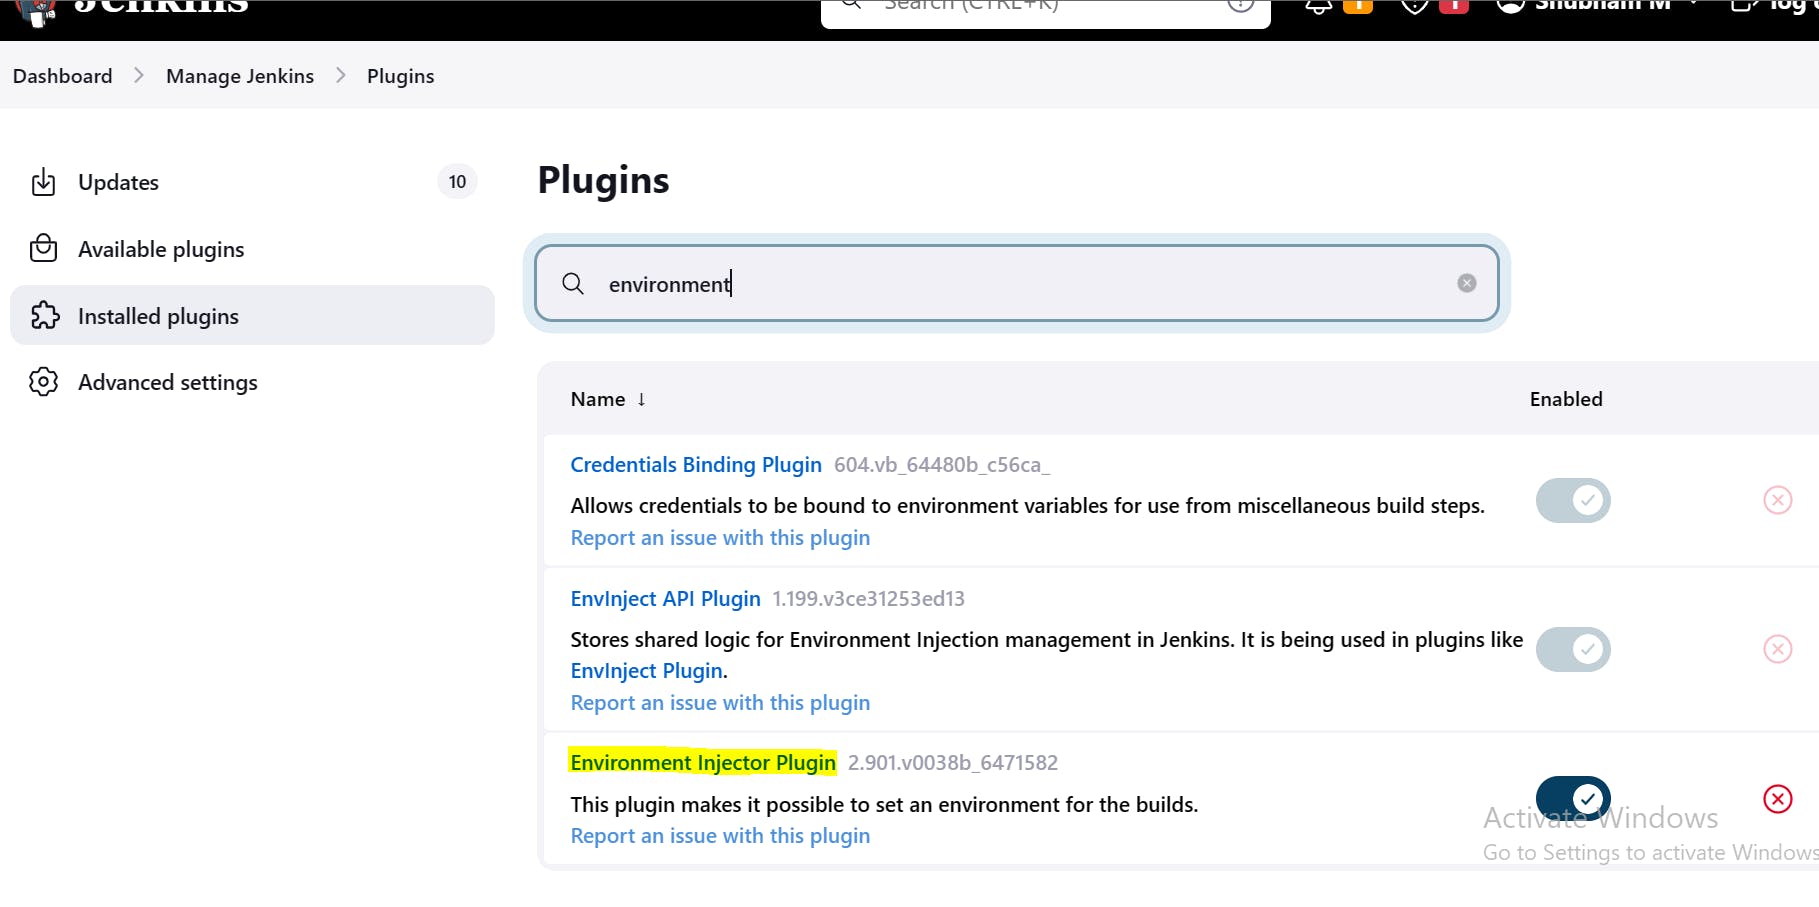
Go to Dashboard --> Manage Jenkins --> Plugins. Search environment in Available Plugins.
So, I installed --> The Environment Injector Plugin allows you to securely manage sensitive credentials such as API keys, passwords, or access tokens. You can inject these credentials as environment variables into your builds without exposing them in plain text. This ensures that sensitive information remains protected and can be used securely within your build steps.
Step 5: Configure DockerHub Credentials:
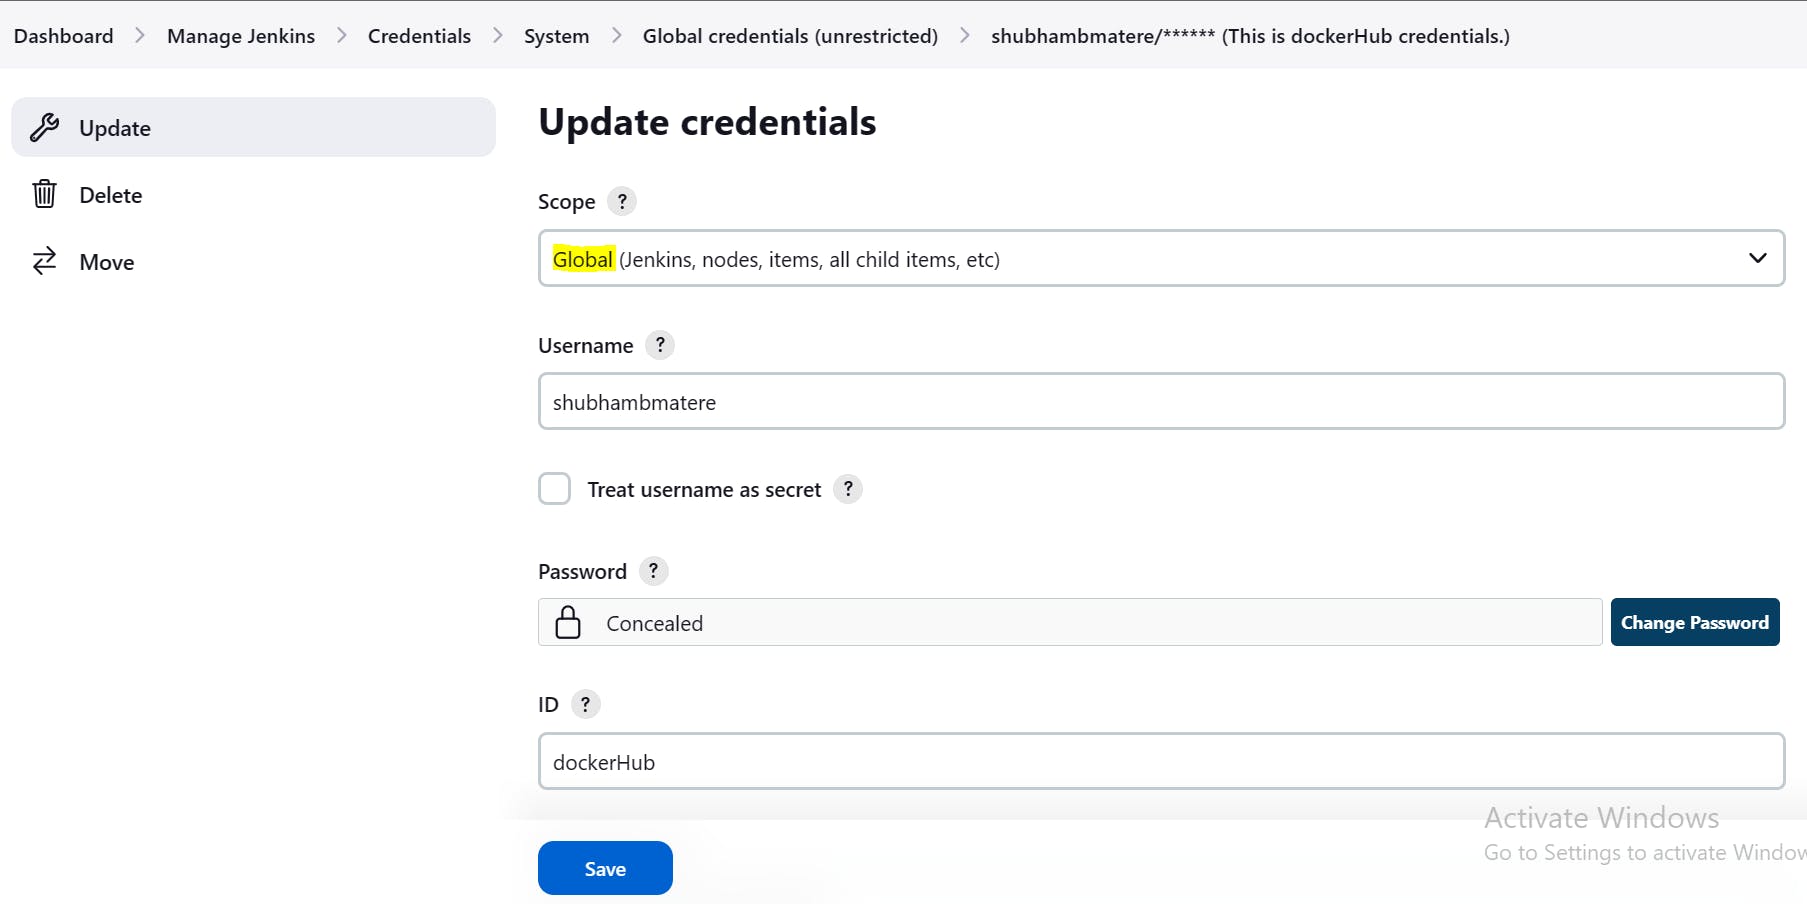
Navigate to "Manage Jenkins" > "Credentials".
Click on "Global" domain, then "Add Credentials".
Fill in your DockerHub username and password, and give it an ID (e.g., "dockerhub-credentials").
Save the credentials.
We will be using our saved global credentials in our Jenkinsfile without compromising security with the help of the above plugin.
steps {
withCredentials([usernamePassword(credentialsId:'dockerHub',
passwordVariable:'dockerHubPass',usernameVariable:'dockerHubUser')])
{
sh "docker login -u ${env.dockerHubUser} -p ${env.dockerHubPass}"
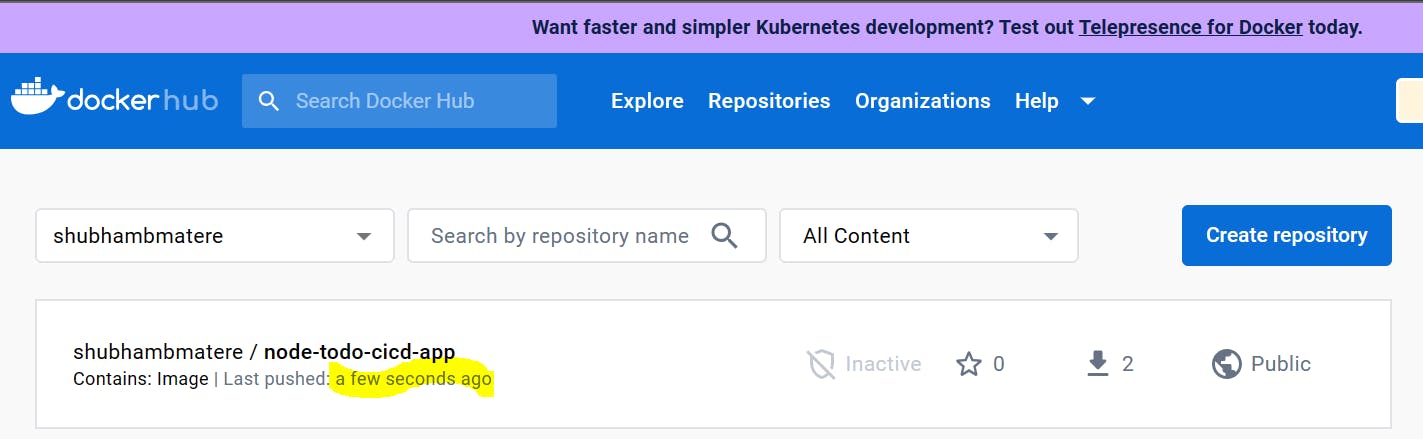
sh 'docker push shubhambmatere/node-todo-cicd-app:latest'
}
Step 6: Define Stages and assign Agent in Jenkinsfile:
In your Git repository, create a file named "Jenkinsfile".
So, on dev branch, I have created the following Jenkinsfile which consists of one agent as image-push-agent, and two stages as Log in to dockerHub And Push Image And Deploy.
pipeline{
    agent { label  'image-push-agent'}

    stages{
        stage('Log in to dockerHub And Push Image'){
            steps {
                echo "DockerHub login in progress..."
                withCredentials([usernamePassword(credentialsId:'dockerHub',
                passwordVariable:'dockerHubPass',usernameVariable:'dockerHubUser')])
                {
                    sh "docker login -u ${env.dockerHubUser} -p ${env.dockerHubPass}"
                    sh 'docker push shubhambmatere/node-todo-cicd-app:latest'
                }
            }
        }
        stage('Deploy'){
            steps {
               echo "Deployment in progress..."
               sh 'docker-compose down && docker-compose up -d'
                }
             }
         }
    }
- So, on the master branch, I have created the following Jenkinsfile which consists of one Agent as dev-build-agent, and two stages as Build And Build And Test.
pipeline{
    agent { label  'dev-build-agent'}

    stages{
        stage('Build'){
            steps {
                git url: 'https://github.com/ShubhamBMatere/node-todo-cicd.git', branch : 'master'
            }
        }
        stage('Build And Test'){
            steps {
                echo "Building and testing in progress..."
                sh 'docker build . -t shubhambmatere/node-todo-cicd-app:latest'
            }
        }
         }
    }
Step 7: Save and Run the Pipeline:
Save the Jenkinsfile in your Git repository.
Trigger the pipeline job in Jenkins by clicking on "Build Now" or wait for an automatic trigger based on Git repository changes.
- Jenkins will execute the defined stages: build, test, and push the Docker image to DockerHub.
Happy automating and deploying your applications with Jenkins!
please feel free to connect.
linkedin.com/in/shubhambmatere
Thank you for reading....................................
Below is the project repository used for this blog